A short capstone: the order to set up a new practice, a pre-go-live checklist, planning the patient data import, and a full test journey.
Who it is for: practice managers and administrators.
In this guide:
- Know the order to set up a new practice
- Run the pre-go-live checklist
- Plan your patient data import
- Test a full patient journey before go-live
1. Know the order to set up a new practice
You can follow the right order for set-up so each step has what it needs.
Why this matters Set-up steps depend on each other. A clinician’s diary needs a slot size; recall types need message templates; treatment codes need to exist before cost centres. Doing things in order avoids redoing work. Allow two to four weeks before go-live.
The order
- People – add every member of staff with their own login and the right role (Staff accounts). Set up account groups.
- Permissions – check each person’s capabilities (Roles, capabilities and least privilege).
- Practice preferences – details, sites, opening hours and slot size, two-step sign-in, NHS contracts, accounting prefixes, email and Esendex, recall and reminder defaults (Practice preferences).
- Diary – working patterns and time off for every clinician, appointment types, booking zones, diary order (Housekeeping: diary schedules).
- Money – treatment codes and fees, cost centres, favourites (Housekeeping: treatment codes).
- Recalls – recall types with NICE risk-based intervals, linked to appointment types.
- Clinical lists and documents – medical history form, questionnaires, document classifications, check lists (Housekeeping: patient lists).
- Templates and forms – letters, template notes, online forms, portal (Templates and forms).
- Patient data – import or migrate patients.
- Test – a full dummy patient journey.
Good to know
- Nominate one person as the set-up lead and keep a written log of decisions.
- Book training for staff in the week before go-live.
2. Run the pre-go-live checklist
You can check every essential setting is in place before patients arrive.
Why this matters A missed setting on day one, such as a closed diary column or a reminder that never sends, is very visible to patients. Ten minutes with this checklist the week before go-live saves a stressful first morning.
Tick each one
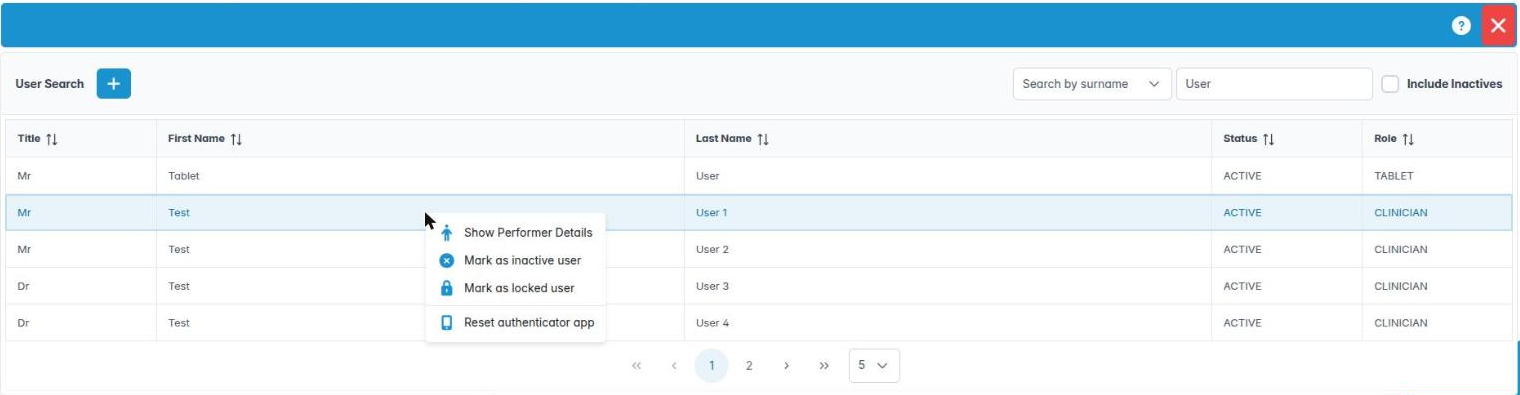
- Users › Find Users – everyone has a login; no shared accounts; clinicians have specialities and GDC numbers; device logins (tablet, kiosk) exist.
- User Capabilities – nobody has more than their job needs.
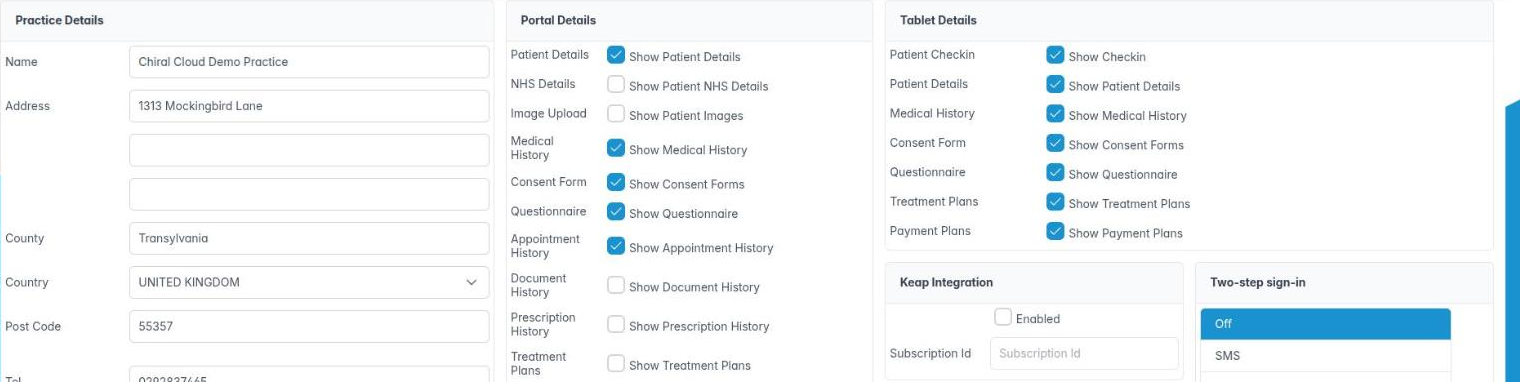
- Preferences › Practice Details – name, address, phone and email are right; two-step sign-in and inactivity lock are set.
- Practice Opening Hours – days, hours and slot size are final.
- NHS Registration and each performer’s UDA Management (NHS and mixed practices).
- Accounting – prefixes and year end.
- Email Account Settings and Esendex – send yourself a test email and SMS.
- Diary Schedules – no clinician shows No pattern; holidays are in.
- Diary Types, Treatment Codes, Cost Centers, Recall Types – complete and checked by a clinician.
- Medical Conditions form and online medical history form are published.
- Patient Templates and System Templates – print a test letter, plan and invoice.
- Diary Sort Order and Diary Colour Selection – the diary looks right.
Good to know
- Sign in as a receptionist and a nurse test login to see what they will see.
3. Plan your patient data import
You can prepare for bringing patients across from your old system safely.
Why this matters Patient records are the heart of the practice. Moving them is a data protection event under UK GDPR: you must keep the data secure in transit, accurate and complete, and you remain responsible for it throughout.
Before the import
- Agree with Chiral Systems what will be brought across: demographics, appointments, balances, recalls, NHS details, notes and documents.
- Ask your old supplier for a full export in good time; some charge or need notice.
- Clean up first: merge duplicates, mark deceased and moved-away patients, fix obvious address errors.
- Make sure Housekeeping lists (titles, recall types, appointment types, treatment codes) are ready, because imported records are matched to them.
- Record the transfer in your data protection records, and check your contract with Chiral Systems covers processing.
After the import
- Spot-check twenty patients against the old system: name, date of birth, address, balance, next appointment, recall.
- Check future appointments sit in the right clinician’s diary at the right time.
- Check outstanding balances total the same as the old system’s aged debt report.
- Keep read-only access to the old system for as long as your retention policy requires.
Good to know
- Never send patient exports by ordinary email; use the secure method agreed with Chiral Systems.

4. Test a full patient journey before go-live
You can run a dummy patient through booking, treatment, payment and recall to prove the set-up works.
Why this matters A full test is the only way to know that all the settings work together: that a booking shows in the right column, the reminder arrives, the treatment code has the right fee or NHS band, the invoice prints with your details, and a recall is set at the end.
How to
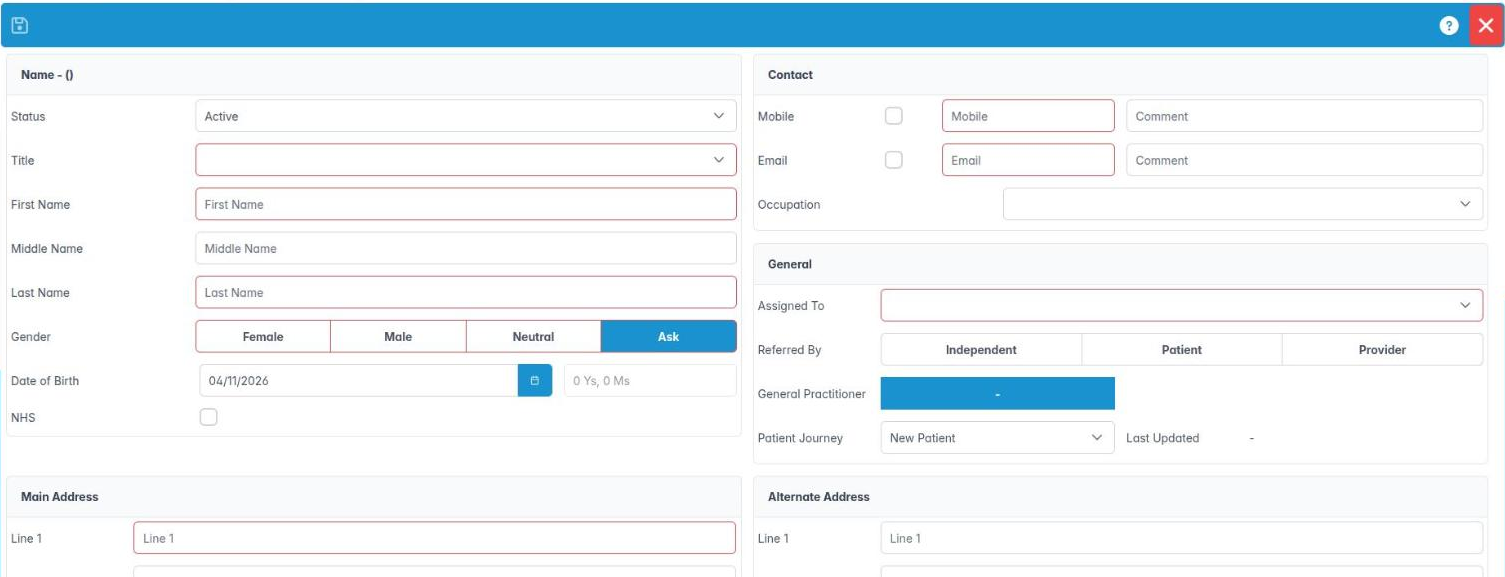
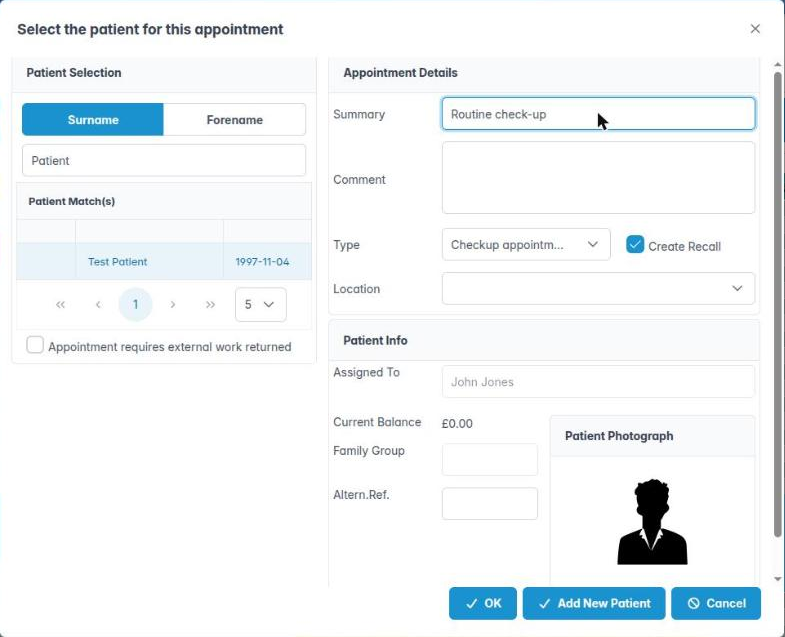
- Add a test patient using your own mobile and email, with an obvious name such as “Test Patient”.
- Book an exam in the Practice Diary with a real clinician. Check it lands in the right column and colour.
- Check the booking confirmation and reminder arrive by SMS and email.
- Send the online medical history form and complete it on your phone; add it to the medical history.
- Check the patient in (try the kiosk if you have one), open the appointment and chart a few treatment codes.
- Complete the appointment, issue the invoice and take a test payment. Print the invoice and check your details.
- For NHS practices, check the claim appears in NHS Management under Stacked with the right band; do not submit it.
- Check a recall has been set at the expected interval.
- Afterwards, reverse the payment, cancel the claim and mark the test patient inactive.
Good to know
- Repeat the test as a receptionist and a clinician login to catch permission gaps.
- Note anything odd and fix it before go-live day.