
Use BPE results to decide when to chart, then record and review 6-point periodontal charts with plaque and bleeding scores.
Who it is for: clinicians, dental nurses.
In this guide:
- Know when a full periodontal chart is needed
- Start a new periodontal chart
- Enter probing depths, recession and mobility with the keyboard
- Record plaque and bleeding scores
- Review previous charts and delete one made in error
1. Know when a full periodontal chart is needed
You understand how BPE scores lead to 6-point charting and where ChiralCloud records each.
Why this matters: the British Society of Periodontology (BSP) guidance is that every adult has a Basic Periodontal Examination (BPE) at each routine exam. The BPE decides what happens next. A full 6-point pocket chart is the evidence for diagnosing and staging periodontitis (2017 classification), for planning non-surgical therapy, and for showing the patient whether treatment worked. Missing perio diagnosis is one of the most common causes of dental negligence claims in the UK.
Where to find it:
- The BPE is recorded on the Assessment tab (field BPE/CPITN, with BPE RX Indicated). For NHS patients, also tick Basic Periodontal Exam on the NHS KPIs tab.
- Full charts are on the Perio tab, in the patient record or in the appointment editor.
How to decide
- BPE 0, 1 or 2 – oral hygiene advice, remove plaque-retentive factors and calculus. No full chart needed.
- BPE 3 – after initial therapy, record a 6-point chart in that sextant (BSP guidance) to monitor response.
- BPE 4 or \* (furcation) – record a full mouth 6-point chart: probing depths, recession, bleeding, mobility and furcation. Consider radiographs and referral.
- Repeat the full chart after non-surgical therapy to compare.
Good to know
- Under-18s get a simplified BPE on index teeth from age 7. Follow BSP paediatric guidance.
- A perio chart is part of the clinical record. Record who did it, and link findings to your diagnosis in the notes.
- Hygienists and therapists working under prescription or direct access can record perio charts in the same way.
More detail: Patient periodontal chart 2.
2. Start a new periodontal chart
You can add a new chart and put it into edit mode ready for readings.
Why this matters: each perio chart is a dated snapshot. Starting a new chart for each examination (rather than overwriting an old one) is what lets you compare before and after therapy.
Where to find it: the Perio tab, in the Periodontal Charting panel. The Charting History list sits at the top with Date and By columns.
How to
- Click the + button (Add Periodontal Chart) in the Charting History header.
- A new row appears at the top with today’s date and your name.
- Right-click the new row and choose Edit Perio Chart. The chart below is now editable: the first row label shows \\ Mobility \\.
- If you prefer to see more of the chart, use Zoom In and Zoom Out in the Chart panel header.
- Enter readings (see the next step), then click Save on the toolbar.
Good to know
- Selecting a chart in the history always opens it read-only. Use Edit Perio Chart to change it.
- If you try to type and nothing happens, the chart is still read-only.
- Charts are listed oldest first. The newest one is the last row.
More detail: Patient periodontal chart 2.

3. Enter probing depths, recession and mobility with the keyboard
You can record a 6-point chart quickly using the keyboard.
Why this matters: a full 6-point chart is 192 sites. Charting by keyboard, with the nurse typing as the clinician calls out readings, is the only practical way to do it at chairside.
Where to find it: the Chart on the Perio tab, once the chart is in edit mode.
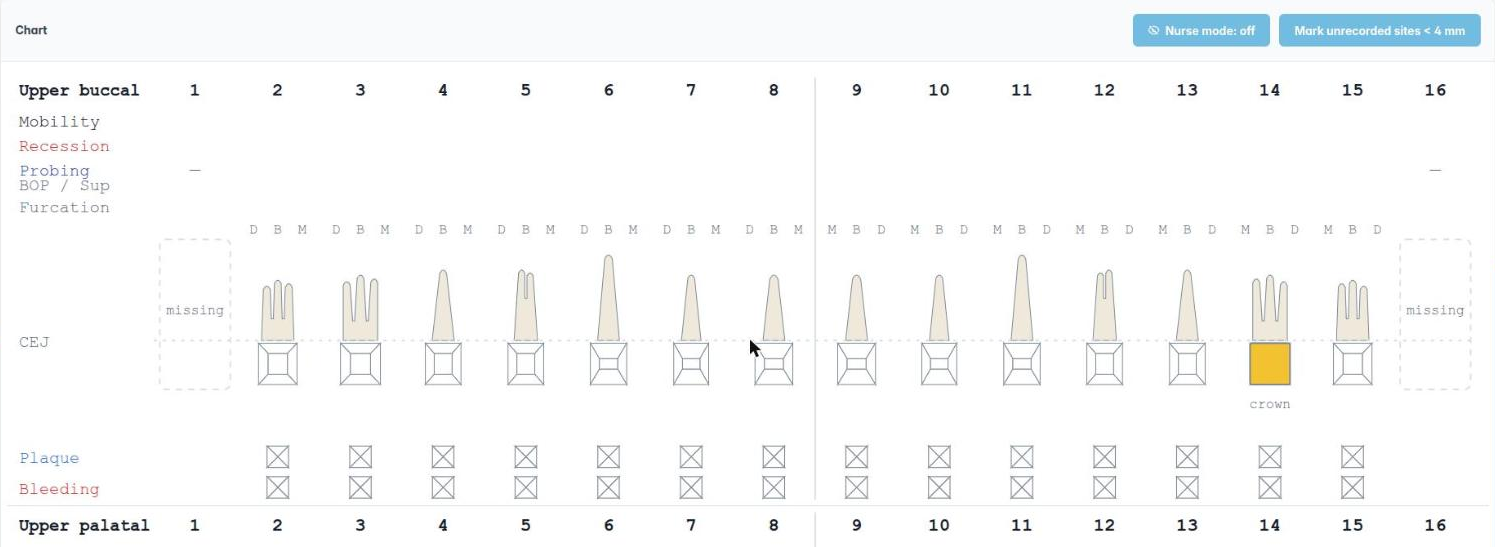
How the chart is laid out
- Upper arch rows: Mobility, Gingival Recession (buccal), Probing Depth (buccal), then Gingival Recession and Probing Depth (palatal).
- Lower arch rows: the same five, buccal then lingual.
- The selected row is marked with asterisks, for example \\ Probing Depth \\. Click a row label to select it.
How to
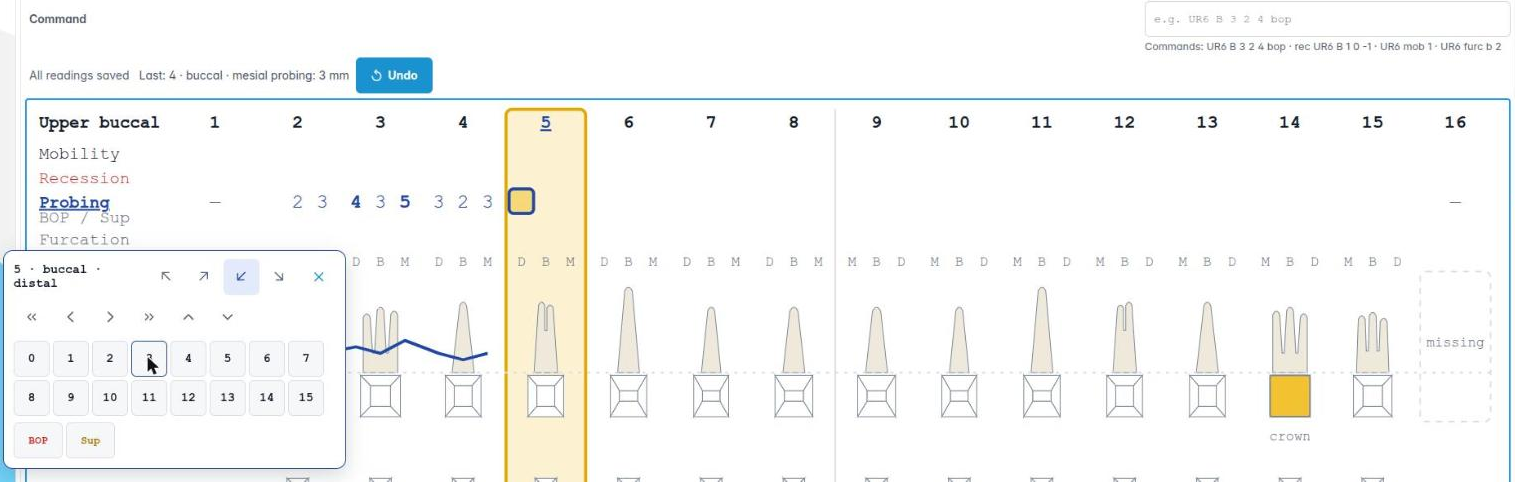
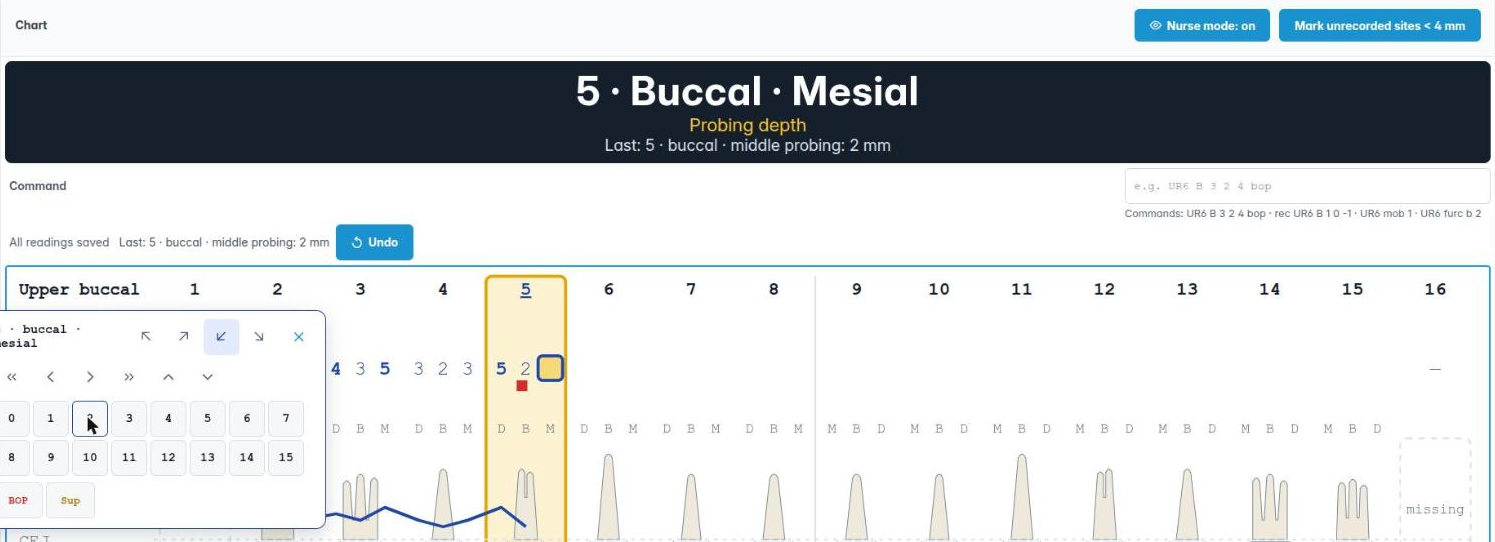
- Type a number (0–9) for each site. The cursor moves on automatically, three sites per tooth (mesial, mid, distal) for depths and recession, one per tooth for mobility.
- Use the left and right arrow keys to move between sites, up and down to change row, Page Up and Page Down to jump between buccal and lingual rows, and Home or End to jump to the first or last site.
- Press B at a site to mark bleeding on probing, S for suppuration, and F to cycle the furcation grade on multi-rooted teeth.
- Click Save on the toolbar when done.
Good to know
- The nurse should repeat each reading back if unsure. Errors are easy to make at speed.
- Record recession as a positive number. Clinical attachment loss is depth plus recession.
- BSP staging uses the worst interproximal attachment loss, so take care at mesial and distal sites.
More detail: Patient periodontal chart 2.

4. Record plaque and bleeding scores
You can record plaque and bleeding on the chart and read the percentage scores.
Why this matters: plaque and bleeding scores show the patient’s home care and gum inflammation in a number they can understand. Under BSP guidance, a full mouth bleeding score is used to separate gingivitis from health, and repeat scores show whether advice is working. They are good motivators and good evidence for the record.
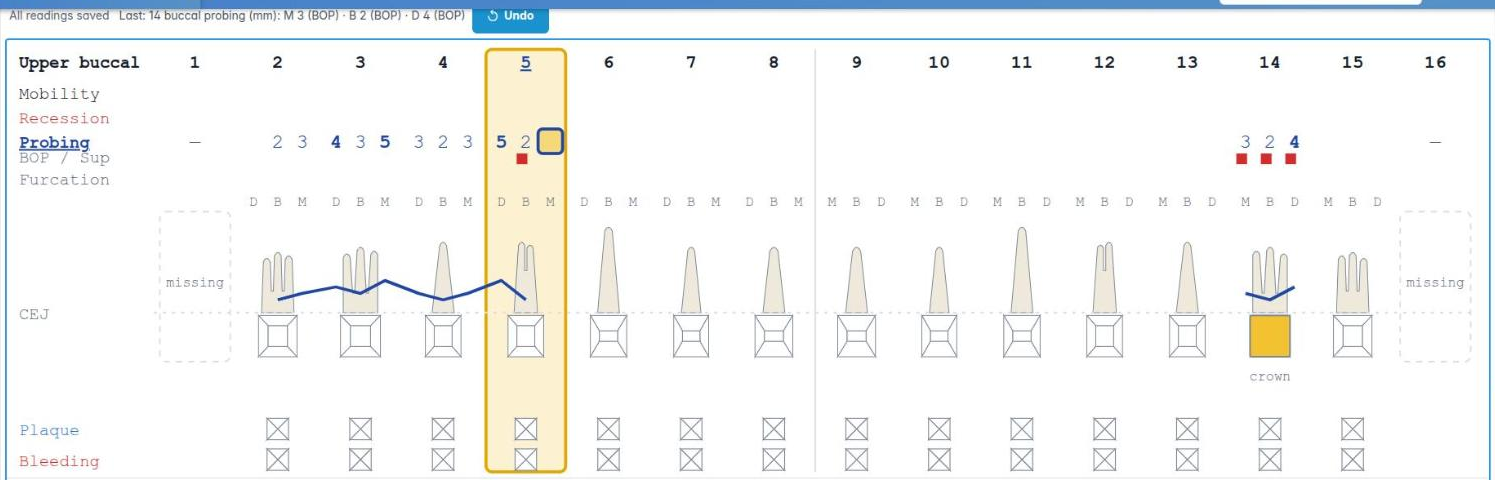
Where to find it: the plaque and bleeding tooth rows at the bottom of the Chart, with percentage totals beside them.
How to
- Make sure the chart is in edit mode (Edit Perio Chart).
- In the bleeding row, click each site that bled on probing. Click again to clear it.
- In the plaque row, click each site with visible plaque.
- Read the totals: Upper %, Lower % and the overall Bleeding % and Plaque %.
- Save on the toolbar.
Good to know
- Bleeding marked with the B key during probing and clicks in the bleeding row work in the same chart.
- Tell the patient their scores and record the advice you gave (OHI, interdental cleaning) in the notes.
- For NHS patients, tick Visible Plaque and Basic Periodontal Exam on the NHS KPIs tab where relevant.
- A bleeding score under about 10% is usually described as periodontal health; record your interpretation, not just the number.
More detail: Patient periodontal chart 2.
5. Review previous charts and delete one made in error
You can compare charts over time and remove a chart created by mistake.
Why this matters: comparing today’s chart with the one before therapy shows whether pockets have reduced and bleeding has settled. That comparison is the basis for your re-evaluation and for deciding whether to refer to a specialist periodontist.
Where to find it: Charting History on the Perio tab.
How to
- Click a chart in Charting History to view it. It opens read-only.
- Click another date to compare. Note the change in deepest pockets, bleeding % and plaque %.
- Record your comparison and next steps in the clinical notes.
- To remove a chart created in error, right-click it and choose Delete Chart.
- Confirm Yes to Are you sure you want to delete this Periodontal chart.
Good to know
- Only delete a chart that was a genuine mistake (for example started on the wrong patient). Never delete a real record to tidy up. Deleting clinical records you should keep can breach GDC standards and data-protection retention rules.
- The Show Periodontal Chart and Print Periodontal Chart buttons in the panel header are not available yet. They show This feature is not yet implemented. If you need a printed copy for a referral, use your practice’s agreed workaround (for example a screenshot added to the referral letter).
More detail: Patient periodontal chart 2.