Create, copy and sequence treatment plans, cost them correctly for NHS or private care, give a written plan for consent and review treatment history.
Who it is for: clinicians, dental nurses.
In this guide:
- Open a patient’s treatment plans
- Set the plan title, status and notes
- Build the plan: chart treatments and add charges
- Split the plan into appointments
- Give the patient a written plan and estimate
- Review and correct the patient’s treatment history
1. Open a patient’s treatment plans
You can open the treatment plans screen and find, copy or delete plans.
Why this matters: a treatment plan sets out what you propose, what it costs and how many visits it will take. Patients often have more than one option to consider (for example a bridge or an implant), so being able to keep, copy and compare plans makes consent conversations easier.
Where to find it: click Patient Treatment Plans on the toolbar of the appointment editor or the patient record. You can also right-click an appointment in the diary and choose Show Treatment Plan.
How to
- The Treatment Plans tab lists every plan with Created On, Title, Description and Status (Proposed or Accepted).
- Tick Include Appointments to also show the automatic Standard Course of Treatment plans that hold ordinary bookings.
- Double-click a plan, or right-click it and choose Edit Plan, to open it in its own tab (named after the plan title).
- Click + (Add Plan) to start a new plan.
- To offer an alternative, right-click a plan and choose Copy Plan. Confirm Are sure you want to copy this treatment plan, then type a Plan Name in New Treatment Plan Name and click OK.
- To remove a plan, right-click and choose Delete Plan, then confirm. Accepted plans cannot be deleted.
Good to know
- Patient Payment Plans on this toolbar opens payment plans (covered in payment planning).
- Save and Save & Exit work as elsewhere. You’ll be asked to save unsaved changes before closing.
More detail: Patient treatment history 2.
2. Set the plan title, status and notes
You can fill in the General section of a plan and set its status.
Why this matters: the title and description tell everyone (and the patient) what the plan is for. Status shows whether the patient has agreed it. General notes are a good place to write the options discussed and the patient’s reasons, which is the heart of Montgomery-style consent.
Where to find it: open a plan. The General section is at the top.
How to
- Give the plan a clear Title, for example Option 2 – implant UL6.
- Set Status: Proposed while the patient is deciding, Accepted once they agree, Rejected if they decline, Closed when finished.
- Choose the Patient Journey stage if your practice uses them. Some stages trigger a follow-on recall: the Add Recall Follow On dialog opens so you can set one.
- Use Alt.Ref. for any external reference.
- Write in General Notes. Good content: the diagnosis, the options offered (including doing nothing), the risks and benefits of each, the cost, and what the patient chose and why.
- For NHS patients, the NHS KPIs tab is also shown here.
- Save.
Good to know
- Under Montgomery v Lanarkshire (2015) and GDC Standard 3, you must tell the patient about material risks and reasonable alternatives, in a way they understand, and give them time to decide.
- Once a plan is Accepted it cannot be deleted.
More detail: Patient treatment history 2.
3. Build the plan: chart treatments and add charges
You can add treatments to a plan from the chart or by code.
Why this matters: each item in the plan becomes a line on the patient’s estimate. Charting it on the tooth means the chart, the estimate and the record all agree.
Where to find it: the plan tab. Below General is the charting section (the mouth with the Images tray beside it), then the treatment lists.
How to
- Use Adult | Child just as in the appointment editor. A plan is treatment only, so there’s no Existing | Treatment selector.
- Click the tooth (or drag across its surfaces) to open the Tooth Dial, and choose the item, then the material and code. The charge is added at once, with no dialog; Undo takes it off again.
- For items not tied to a tooth, click Add New Treatment or right-click the treatment list and choose Add Treatment. Choose from Favourites or Code Search, set the Quantity, then Add Treatment and Finish.
- Right-click a treatment to Edit Treatment or Delete Treatment (confirm Yes).
- New items go into the unassigned list on the left until you put them into appointments.
- Save.
Good to know
- NHS patients: the patient pays the band charge for the course (Band 1, 2 or 3, or urgent), not item by item. List all clinically necessary treatment. Private options must be clearly separated and agreed in writing (mixing NHS and private in one course must follow NHS rules).
- Private patients: each item takes its fee from your practice’s fee scale. Discount codes apply a percentage across the plan.
More detail: Patient treatment history 2.
4. Split the plan into appointments
You can create the visits for a plan and drag treatments into them.
Why this matters: sequencing the work (stabilise, then restore, then replace teeth) is good clinical practice. Splitting it into visits also tells reception how many appointments to book, how long each one is and how far apart they should be.
Where to find it: the appointments list on the right of the plan tab.
How to
- Click Add new Appointment to create a visit.
- Drag a treatment from the unassigned list on the left and drop it onto the appointment. You can also drag treatments between appointments.
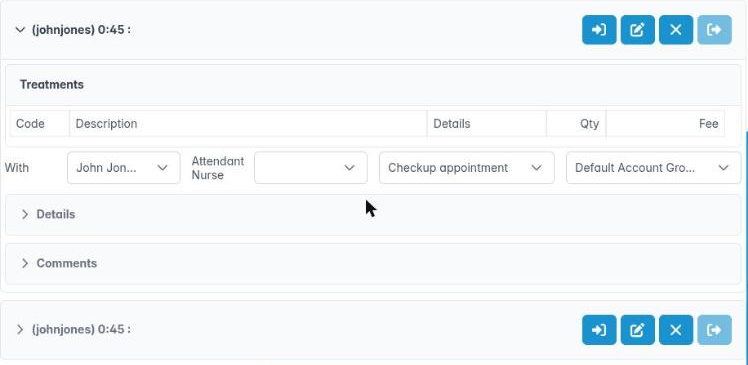
- Set each visit’s details: With, Attendant Nurse, Time Required and Interval (minimum and maximum days after the previous visit).
- Use Edit appointment title (the Appointment Comment dialog) to set the type and a comment.
- Open Appointments / Close Appointments expands or collapses them.
- Delete an unwanted visit and confirm Are you sure you want to delete this appointment?
- Save.
Good to know
- Treatments already invoiced or receipted cannot be moved.
- Placing the appointments in the diary is done by reception from the handover, or by you with Place appointment in diary in the appointment editor.
- Click Hand patient over to reception on the toolbar to send the booking instructions.
More detail: Patient treatment history 2.
5. Give the patient a written plan and estimate
You can create, view and print the treatment plan document for the patient to sign.
Why this matters: patients must have a written treatment plan and cost. For NHS courses, the personal dental treatment plan (FP17DC) is required for Band 2 and Band 3 courses, and whenever private treatment is offered alongside NHS. Private patients should get an itemised estimate before treatment starts (GDC Standard 2.4). A signed copy is your evidence of informed consent.
Where to find it: the toolbar on the right when a plan is open.
How to
- Click Create a treatment plan document. In Patient Treatment Plan, choose a template from Templates, give it a Document Name and Notes, then OK. The document is saved to the patient’s Documents.
- Click View Treatment Plan to open the plan in a Treatment Plan PDF tab. Use Download to save it, or the x to close.
- Click Print treatment plan to print a copy for the patient to sign.
- Explain each option and its cost, answer questions, and give the patient time if the treatment is complex or costly.
- When the patient agrees, set the plan Status to Accepted, scan or upload the signed copy to Documents, and note the consent discussion in the clinical notes.
Good to know
- Send To Tablet in the document dialog is not available yet.
- Use Create a patient payment plan if the patient wants to spread the cost (payment planning module).
More detail: Patient documents.
6. Review and correct the patient’s treatment history
You can see completed and outstanding treatments, tick off work done and print the history.
Why this matters: the treatment history is the running list of every charge for the patient. Checking it before you start shows outstanding work from previous plans and stops duplicate charges.
Where to find it: the Treatment tab of the patient record, or the Treatment History tab in the appointment editor.
How to
- The list starts as Current Treatment History: treatments not yet invoiced. Click the button to Show full treatment history; click again to Show current treatment history.
- Columns: tick box, Date, Qty, Code, Description, Site, Fee, Transaction and Provider.
- Tick a treatment to mark it complete (ready to charge). Untick to put it back. Invoiced and receipted items are always ticked.
- Click Show the patient treatment history to view it as a report, or Print the patient treatment history. In Treatment History Details choose Full or Date Range (with Start Date and End Date) and click OK.
Good to know
- Ticking here has the same effect as ticking in the appointment, so only tick work that was done.
- The Summary tab shows appointment history: right-click an appointment for Goto Appointment or Practice Day Diary, or use Show and Print for the appointment history (the reminder items on that menu are for reception).
More detail: Patient treatment history 2.