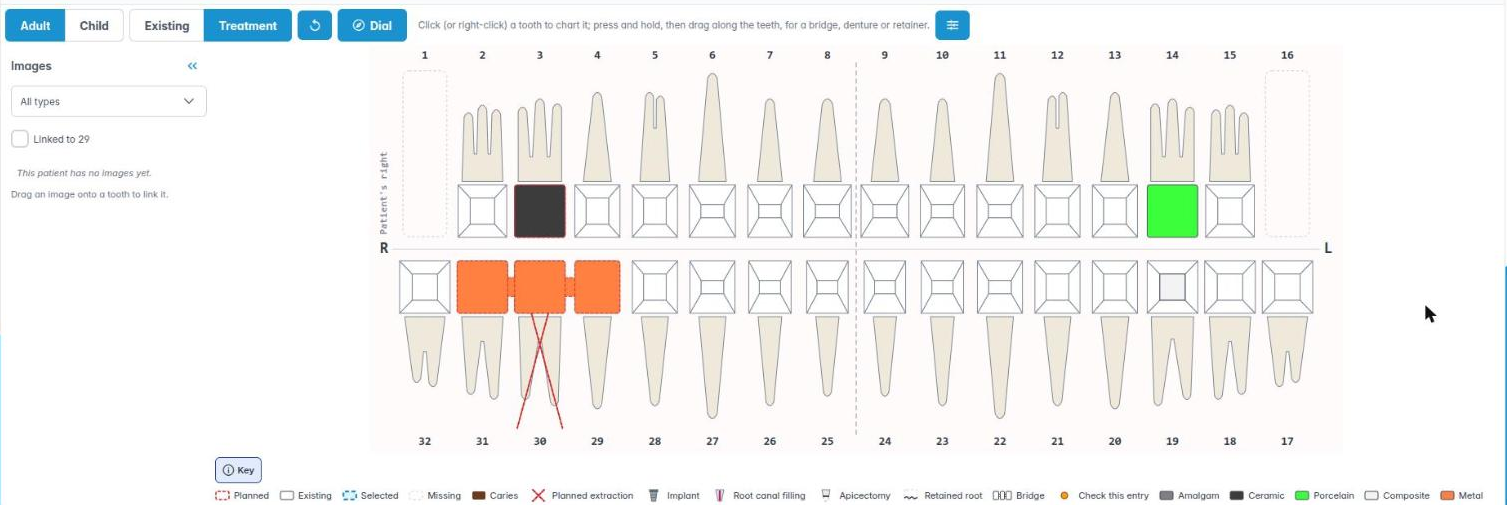
Chart existing work and planned treatment with the Tooth Dial on the adult or child chart: surfaces, spans and roots, the placement rules, the tooth history, images on teeth and the Key; correct entries, add non-tooth treatments and move or complete charges.
Who it is for: clinicians, dental nurses.
In this guide:
- Find your way around the dental chart
- Choose Existing work or Treatment charting
- Record existing work with the Tooth Dial
- Chart surfaces, repeat and undo, and use the keyboard
- Review and correct Existing work entries
- Chart planned treatment and add it to an appointment
- Understand greyed items and warnings on the dial
- Chart a bridge, denture or retainer
- Chart root canal treatment and other root work
- Read a tooth’s history and keep covered work
- Link images to teeth (Image On Tooth)
- Add, edit and delete treatments without charting
- Move treatments between visits and mark them complete
1. Find your way around the dental chart
You can open the charting panel, switch between the adult and child chart, read the tooth labels and the Key, and find the Tooth Dial controls.
Why this matters: an accurate chart is the baseline for every diagnosis, treatment plan and NHS claim. In the UK, charts and notes are usually written in Palmer-style quadrant notation (UR, UL, LL, LR with 1–8 for adult teeth and A–E for baby teeth). Some referral letters and specialists use FDI two-digit numbers (11–48, 51–85). You need to be confident which tooth is which before you chart anything.
Where to find it: Appointment Treatments tab › the panel titled Patient Permanent Charting (Treatment) (or (Existing work), or Deciduous). Click the arrow to expand it.
How to
- Expand the charting panel. Along the top you’ll see Adult | Child, Existing | Treatment, the Dial button and Arrange my Tooth Dial (the sliders icon). Below them, the Images tray sits on the left and the mouth beside it.
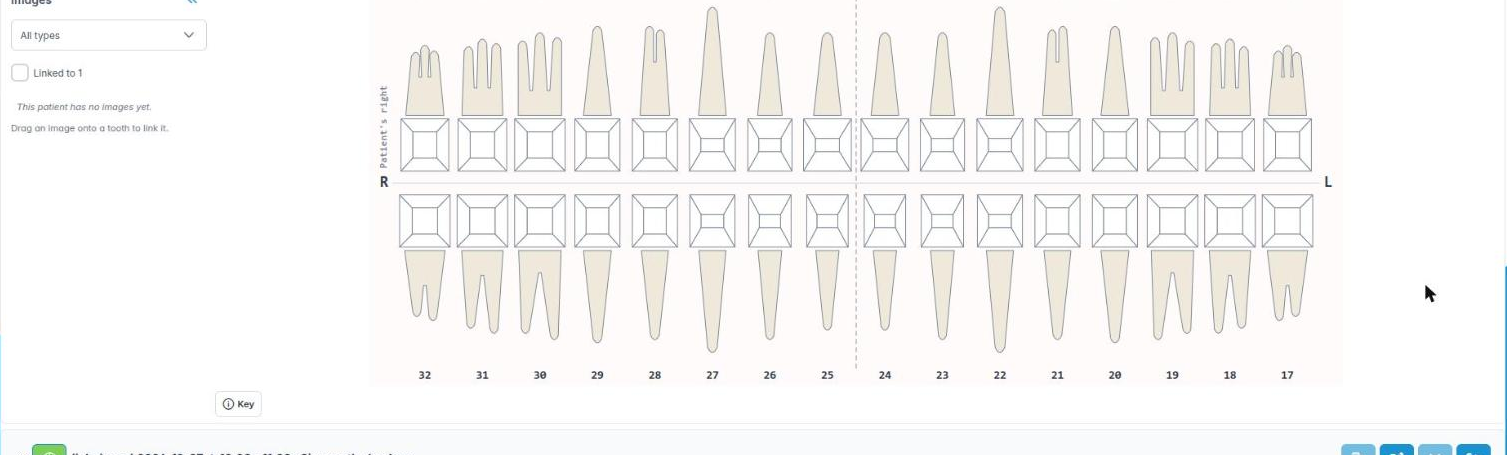
- Teeth are labelled in your practice’s numbering scheme. In British notation that’s UR8–UR1, UL1–UL8, LL1–LL8 and LR8–LR1, with letters for baby teeth, such as URE to URA.
- To chart a child, choose Child; choose Adult to go back. The panel title changes to Patient Deciduous Charting.
- If the other chart holds work, a line above the mouth says so, for example 1 treatment is on the adult chart. Click Show adult chart to switch.
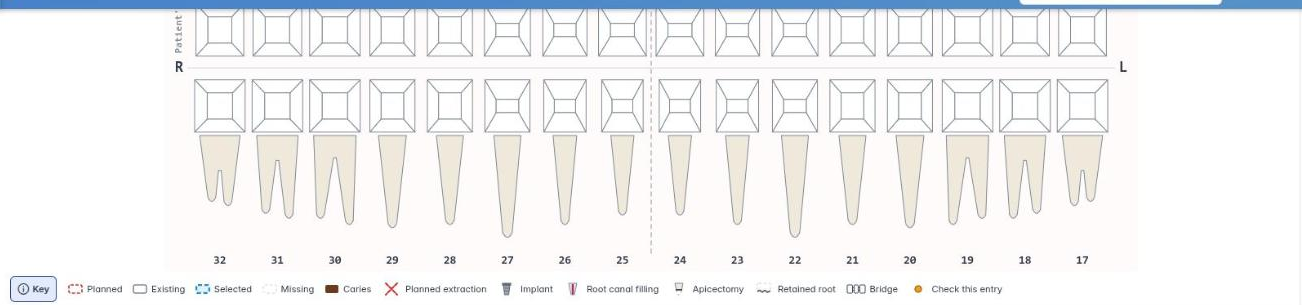
- Under the mouth, the Key explains the drawing: Planned, Existing, Selected, Missing, Caries, Planned extraction, Implant, Root canal filling, Apicectomy, Retained root, Bridge and Check this entry, then the materials used on this chart. Click Key to hide or show it; this computer remembers your choice.
- There’s no list of items to pick from. You click a tooth and choose from the Tooth Dial, as the next steps show.
Good to know
- The numbering scheme is set in Preferences › Charting Systems › Tooth Numbering Scheme (British, American, European).
- Dial turns the Tooth Dial on or off for you only. Leave it on.
- Arrange my Tooth Dial lets you choose your own first ring. Your practice’s standard layout is set in Housekeeping › Tooth Dial Layout.
More detail: Charting systems.
2. Choose Existing work or Treatment charting
You know when to record existing conditions (Existing work) and when to chart planned treatment (Treatment).
Why this matters: a chart has two jobs. Existing work records what is already in the mouth when you examine the patient: existing fillings, crowns, missing teeth, caries, watch areas. Treatment records what you are going to do, and each item you chart becomes a charge on the plan. Mixing them up means either charging for work already done elsewhere, or losing the record of the patient’s starting point.
Where to find it: the charting panel header shows (Existing work) or (Treatment). The Existing | Treatment selector above the chart switches between them.
How to
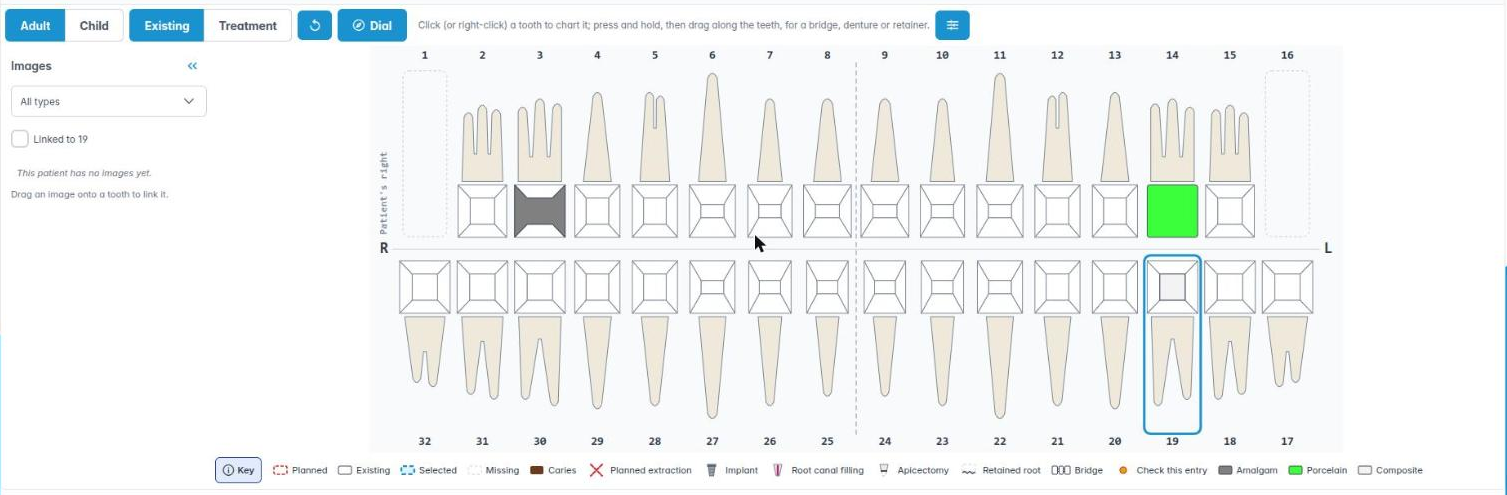
- At a new patient exam or a recall, choose Existing on the selector. The header changes to Patient Permanent Charting (Existing work).
- Chart everything already present (see Record existing conditions).
- Choose Treatment on the selector to chart the treatment you are proposing. The header shows (Treatment).
- Below the mouth you’ll see either the Existing work list (in the Existing work view) or the appointment and treatment list (in the Treatment view).
Good to know
- The dental chart must be switched on in Preferences › Charting Systems (Dental Charting tick box). It turns the whole chart on or off, existing work and treatment.
- The Tooth Dial changes with the view, and its middle says which one you’re in. In Existing work it records what is there; items such as Caries are only offered here. In Treatment it offers only what your practice has a treatment code for, and each choice becomes a charge.
- Your administrator sets up the treatment codes and favourites in Housekeeping.
More detail: Base charting favourites.
3. Record existing work with the Tooth Dial
You can open the Tooth Dial on a tooth and chart existing restorations, missing teeth and conditions in the Existing work view.
Why this matters: the Existing work chart is the record of the patient’s mouth before you treat it. It protects you if a patient later disputes what was already there, and it gives the next clinician an accurate picture. Chart what you see, not what you assume.
Where to find it: the charting panel with Existing chosen on the Existing | Treatment selector.
How to
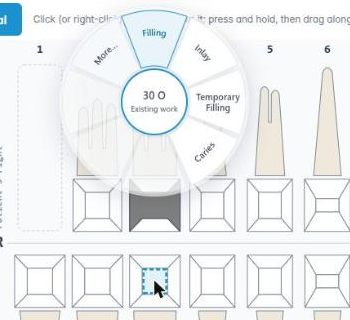
- Click a tooth. The Tooth Dial opens beside it, and the tooth is marked Selected with a dashed blue outline. A slow click, a long press on a tablet, or a right-click opens it too.
- The middle of the dial (the hub) names the tooth, for example UR6. Ring 1 holds your practice’s items for that part of the tooth: on the whole tooth, things like a crown, root canal treatment, extraction, watch and missing; on the crown surfaces, fillings, inlays and caries.
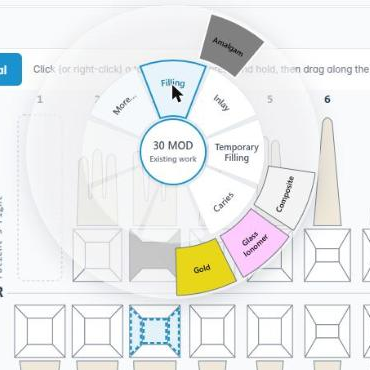
- Choose an item. If it comes in materials, ring 2 shows them as coloured swatches: choose one to chart it. An item with no material is charted straight away.
- Anything that isn’t on ring 1 is under More…, which has a Filter… box. More… also holds History…, Reset tooth (clears what you’ve charted on that tooth) and Bridge, denture or retainer….
- After each choice the Undo bar appears at the bottom right for a few seconds and names what you charted. Click Undo if it was wrong.
- To close the dial without charting anything, press Escape or click away from it.
- Save on the toolbar.
Good to know
- To chart fillings on particular surfaces, drag across them first. See Chart surfaces, repeat and undo, and use the keyboard.
- Bridges, dentures and retainers span several teeth. See Chart a bridge, denture or retainer.
- A greyed item can’t be charted on that tooth. Tap it to read why.
More detail: Base charting favourites.
4. Chart surfaces, repeat and undo, and use the keyboard
You can pick crown surfaces by dragging or from the keyboard, chart them in one dial choice, repeat it with Again and take it off with Undo.
Why this matters: fillings, caries and inlays are recorded per surface, and the surfaces give the notation (MO, MOD) on the notes, the estimate and the claim. Picking them in one movement is quicker than clicking each one, and the keyboard lets a nurse chart as the dentist calls out findings.
Where to find it: the crowns of the teeth on the chart.
How to: with the mouse or a finger
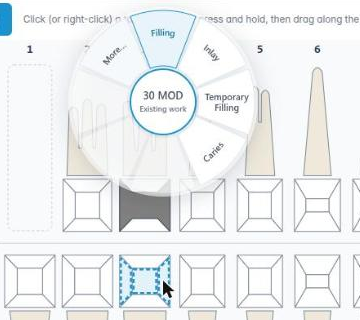
- Press on a crown surface and drag across the surfaces you want. Each one gets a dashed blue outline, and a label by the pointer shows the tooth and surfaces, for example UR6 MO (in your practice’s numbering). A surface that isn’t next to the ones you have is refused (not next to it).
- Let go. The dial opens for those surfaces. Choose, for example, Filling and then the material.
- A single click on a surface picks just that one. On a tablet, hold the surface briefly first.
How to: with the keyboard
- Press Tab until the chart is focused. The tooth you’re on is outlined.
- Use ← and → to move along the arch, ↑ and ↓ to change jaw, and Home / End for the ends.
- Press M, O, D, B, L, P or I to pick or drop the mesial, occlusal, distal, buccal, lingual, palatal or incisal surface.
- Press Space (or Enter) to open the dial. Move round it with the arrow keys, press Enter to choose and Escape to step back.
Repeat and undo
- On the next tooth the hub offers Again, for example Again: Filling · Composite. One click charts the same there.
- After each choice the Undo bar shows what was charted, such as UR6 MO · Filling · Composite. Click Undo within a few seconds to take it off.
Good to know
- With the chart focused, H opens the tooth’s history and I its linked images.
- Escape lets go of the surfaces you picked.
More detail: Base charting favourites.
5. Review and correct Existing work entries
You can check the list of existing work entries and remove ones charted in error.
Why this matters: every mark in the Existing work view is also stored as an entry with a date and the name of who charted it. That list is your audit trail. When something is wrong, you correct the entry rather than leave a misleading chart.
Where to find it: below the mouth when the chart is in the (Existing work) view, in the panel Existing work.
How to
- Look through the columns: Date, Entry, Details, Comment and By.
- Click an entry to highlight the matching tooth on the chart.
- To remove an entry made in error, right-click it and choose Delete Item.
- Save on the toolbar.
Good to know
- Delete Item is greyed out for entries that are not existing work entries (for example ones that came from treatment) and when nothing is selected.
- Edit Item on the right-click menu does not do anything yet. To change an entry, delete it and chart it again.
- An entry that no longer makes sense, for example a post whose root canal treatment has gone, shows Not possible – … Check this entry. under it. It is never removed for you: check it and correct it.
- Correcting a chart is fine; altering records to hide an error is not. If a correction matters clinically, add a note explaining it.
More detail: Base charting favourites.


6. Chart planned treatment and add it to an appointment
You can chart a treatment on a tooth with the Tooth Dial so it becomes a charge on the chosen appointment.
Why this matters: charting treatment on the tooth records exactly what will be done and where, and raises the charge at the same time. This keeps the chart, the plan, the patient’s estimate and the NHS claim in step.
Where to find it: the charting panel with Treatment chosen on the Existing | Treatment selector, and the appointment list underneath.
How to
- In the appointment list, click Select appointment on the visit the work belongs to. If you don’t, it goes on the appointment you’re in.
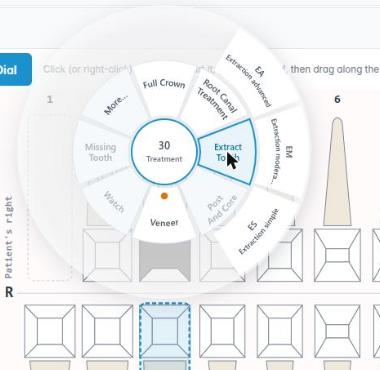
- Click the tooth, or drag across the surfaces you’re treating. The dial opens and its middle says Treatment.
- Choose the item on ring 1, then the material on ring 2. Only items and materials that have a treatment code are offered; a material with no code is struck through.
- If a material has more than one code, ring 3 opens round the outside with each code and its description. Choose one. Some items, such as an extraction, show their codes straight away on ring 2.
- The charge is added to the appointment at once, with its code, description, site and fee. No dialog opens. The Undo bar names what was charted, including the code, in case you need to take it off.
- To change the quantity or add a comment, right-click the treatment in the list and choose Edit Treatment.
- Save on the toolbar.
Good to know
- The dial only offers treatments your practice has set up with a code and fee. Ask your administrator to add missing ones in Housekeeping.
- Items that only record what is already there are greyed in the Treatment view, with the reason, for example Missing records a tooth that is already gone. Use Extract for planned work.
- Bridges, dentures and retainers: see Chart a bridge, denture or retainer.
- NHS fees follow the band of the course, not the individual item. Private fees come from your fee scale.
More detail: Patient treatment history 2.

7. Understand greyed items and warnings on the dial
You can find out why an item is greyed, answer a warning with Yes or No, and use the dial’s suggestions such as Plan extraction and immediate implant.
Why this matters: the dial knows what is already on each tooth and what the plan will do to it. It stops treatment that can’t be done, and asks before anything unusual. That keeps the chart, the plan and the claim consistent, and catches slips before the patient sees an estimate.
Where to find it: on the Tooth Dial and its More… list.
How to read the dial
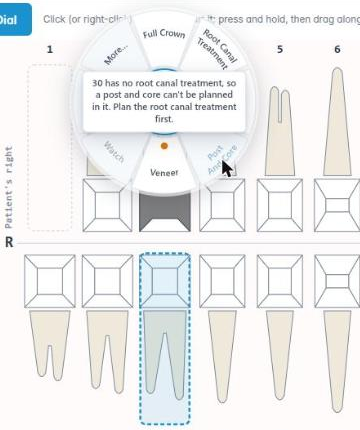
- A greyed item can’t be charted here. It stays in its usual place so you can still find it. Click or tap it, and the reason appears in the middle of the dial, for example UR6 has no implant, so a crown on implant can’t be planned on it. Plan the implant fixture first.
- An item with an amber dot can be charted, but needs a second thought. Choose it and the hub asks a one-line question, for example UR6 is planned for extraction in this plan, so this would be an immediate implant. Plan the implant anyway? Click Yes or No (or press Y / N).
- More… lists the items that aren’t on ring 1. Greyed ones come last, with the reason printed under each.
Suggestions the dial makes
- Plan extraction and immediate implant. In the Treatment view an implant is greyed while the tooth is still standing: … can’t be planned on it yet. Plan its extraction first, or choose “Plan extraction and immediate implant”. The button under the reason plans both in one go, and one Undo takes both off.
- Plan the implant fixture first. A crown on implant needs an implant there, already in the mouth or planned earlier in the plan.
- Apicectomy with root-end filling is offered in the same way when a root-end filling has no apicectomy to go with it.
Good to know
- The Existing work view only refuses what is physically impossible and warns about the rest, because it records what you see. The Treatment view refuses what can’t be planned.
- If removing something leaves another entry with nothing to sit on, you’re asked whether to remove that too. If you keep it, an amber mark appears by the tooth number and the entry reads Check this entry.
More detail: Base charting favourites.
8. Chart a bridge, denture or retainer
You can mark a run of teeth and chart a bonded bridge, implant bridge, denture or fixed retainer on it.
Why this matters: a bridge, denture or retainer spans several teeth, and each one plays a part: an abutment or a pontic, a natural tooth or a replaced one. Recording the span properly means the chart shows what holds what, and the dial can warn you later, for example before you plan to extract a bridge abutment.
Where to find it: on the chart, across a run of teeth in one jaw.
How to mark the span (any one of these)
- Press, hold and drag: press on the first tooth and hold until the ring fills and the tooth lifts (Drag to extend · release to chart this tooth), then drag along the jaw to the last tooth and let go.
- Shift+click: click the first tooth, press Escape to close its dial, then hold Shift and click the last tooth.
- Keyboard: with the chart focused, hold Shift and press ← or →, then press Enter.
- From the dial: open the dial on the first tooth, choose More… › Bridge, denture or retainer…, then click the last tooth.
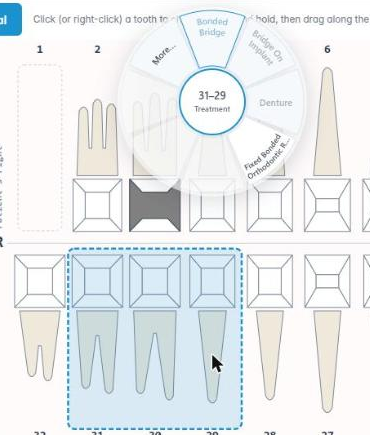
The run is outlined and labelled, for example UR5–UR3 · 3 positions.
How to chart it
- The span dial opens with the items that suit the run, such as a bonded bridge, a bridge on implants, a denture or a bonded fixed orthodontic retainer. Ones that don’t fit are greyed with the reason.
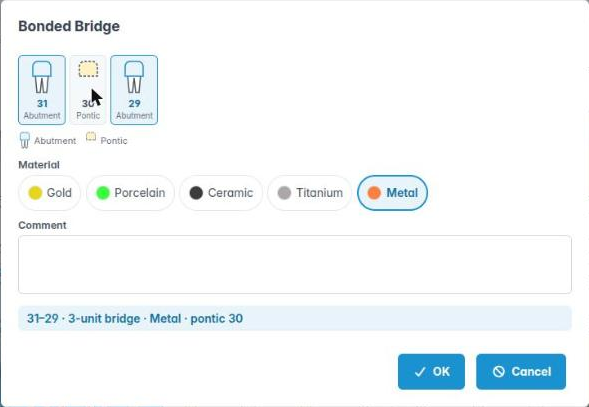
- Choose one, and a material if asked. The span dialog opens.
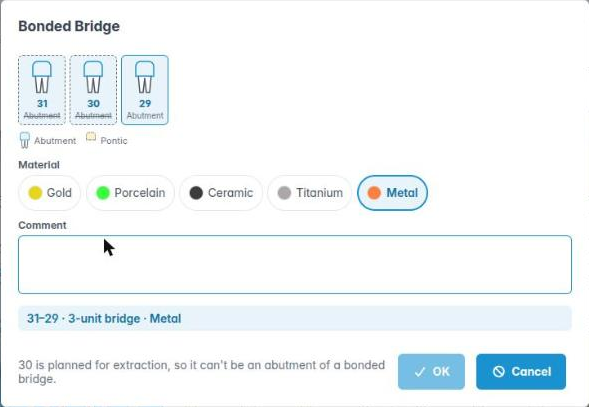
- Tap each tooth to change its part, for example Abutment or Pontic. Choose the Material, the Condition (Existing work only) and add a Comment. The summary line reads, for example, UR5–UR3 · 3-unit bridge · Porcelain bonded · pontic UR4.
- Click OK. If OK is greyed, the reason is printed beside it.
Good to know
- Once a span is marked, everything relates to it: clicking inside it opens the span dial. Click a tooth outside it, or press Escape, to let it go.
- Letting go of a hold without dragging just opens that tooth’s dial, like a click.
More detail: Base charting favourites.
9. Chart root canal treatment and other root work
You can chart root canal treatment, apicectomy, posts and root-end fillings on the right roots, and chart a re-treatment or a repeat apicectomy.
Why this matters: a molar can have one canal re-treated while the others are sound, or one root resected. Recording root work root by root keeps the history accurate for the next clinician, for referral letters and for any decision to re-treat.
Where to find it: the Tooth Dial on the whole tooth.
How to
- Click the tooth and choose a root item, such as root canal treatment, apicectomy, post, post and core, retained root or root-end filling (if your practice has it).
- On a tooth with more than one root, the root picker asks Which roots? Choose All (the whole tooth) or the roots you treated, for example DB, P and MB on an upper molar. MB2 is offered as an extra canal. Then click Chart.
- A root that can’t take the item is greyed, with the reason underneath, and Chart stays greyed until your choice is possible.
- A single-rooted tooth isn’t asked: the item goes on the whole tooth.
Re-treat and repeat
- Once a root has root canal treatment, the dial offers Re-treat beside it. In the Treatment view, plain root canal treatment on that root is refused with Choose Re-treat.
- Once a root has been cut back, the dial offers Repeat apicectomy in the same way.
- If your practice has no re-treatment code, the picker tells you, and it is charged as root canal treatment.
Good to know
- A post needs root canal treatment in that root. In the Treatment view you’ll see Plan the root canal treatment first.
- A root-end filling needs an apicectomy on that root. In the Treatment view the dial offers Apicectomy with root-end filling to plan both together.
- An apicectomy is charted on its own, not as root canal treatment. The chart draws it as a shortened root with a cut line; see the Key.
More detail: Base charting favourites.
10. Read a tooth’s history and keep covered work
You can open a tooth’s history, use the Retain tick for work that later work covers, and spot entries marked Check this entry.
Why this matters: a tooth gathers layers over the years: a filling, then a crown over it, then perhaps root canal treatment. The history shows every layer, who charted it and when, so you know what is really under that crown before you plan.
Where to find it: click the tooth’s number on the chart, press H with the tooth focused, or choose More… › History… on its dial.
How to
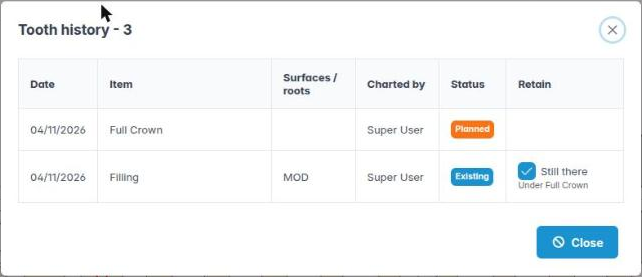
- The Tooth history panel (for example Tooth history – UR6) lists the tooth’s entries, newest first: Date, Item, Surfaces / roots, Charted by, Status (Existing, Planned or Completed) and Retain.
- When later work covers an earlier layer, such as a crown over a filling, that layer has a Retain tick. Ticked (the default) means it’s still there under the crown. Untick it if the work removed it, for example a crown preparation that took the filling away; it then won’t come back on the chart if the crown is ever removed.
- An entry that no longer makes sense is marked Check this entry, with the reason. It’s never removed for you.
- If images are linked to the tooth, they’re listed in an Images section.
- Click Close, or press Escape. If you changed a Retain tick, click Save on the toolbar.
Good to know
- An amber mark beside a tooth number means one of its entries needs checking. The Key shows it as Check this entry.
- Who changed a Retain tick, and when, is recorded and shown in the panel.
More detail: Base charting favourites.
11. Link images to teeth (Image On Tooth)
You can link a patient’s photographs and X-rays to teeth from the Images tray or the Tooth Dial, and open them from the chart.
Why this matters: a periapical X-ray or a clinical photo means most when you can see which tooth it shows. Linking it puts it one click away the next time anyone looks at that tooth.
Where to find it: the Images tray on the left of the chart. It lists the patient’s images from the Images tab, newest first.
How to link an image
- Use the type filter to narrow the list, for example to X-rays. Tick Linked to UR6 (the tooth you’re on) to see only the images linked to it.
- Hover over a thumbnail, or tap it, for a larger preview.
- Drag the thumbnail onto the tooth. Link to UR6 shows while you drag; let go to link it. On a tablet, hold the thumbnail first.
- Or click the tooth and choose Image on tooth UR6… on its dial (the wording follows your practice’s item name, for example Image / XRay on tooth UR6…). Pick the image in Link an image to tooth UR6 and click Link.
How to see linked images
- A tooth with linked images has a small badge by its number. Click it, or press I with the tooth focused, to open the strip. From there you can open an image full size or unlink it (Yes / No).
- The dial on that tooth offers Images (2), and the tooth history lists them too.
Good to know
- A link is saved straight away. It isn’t part of the chart, so it doesn’t need Save.
- Linking from a span links every tooth in it; linking from a surface links the whole tooth.
- An archived image drops out of the tray and the badges until it’s restored.
- On a small screen the tray starts as a narrow strip. Open it to drag images.
More detail: Base charting favourites.
12. Add, edit and delete treatments without charting
You can add treatments that don’t belong to a tooth, and edit or delete treatments on an appointment.
Why this matters: not every item is tooth-specific. Examinations, radiographs, scale and polish, fluoride varnish, sedation fees or lab charges are added directly. Getting these right matters: a missed examination code can make an NHS course look incomplete, and a missed private fee is lost income.
Where to find it: right-click in an appointment’s treatment list.
How to
- Right-click the appointment’s treatment area and choose Add Treatment. The Add New Treatment dialog opens.
- Choose a list from Favourites, or type in Code Search to find any code. The table shows Code, Description and £/%.
- Click a code. Set Quantity, Site (for example UR or upper) and a Comment. Check Cost and Applied Cost. For a discount code you’ll see Discount and Applied Discount instead.
- Click Add Treatment. The dialog stays open so you can add more. Click Finish when done.
- To change one, right-click it and choose Edit Treatment, make your changes and click OK.
- To remove one, right-click it, choose Delete Treatment and confirm Yes to Are you sure you want to delete this treatment?
Good to know
- Add Treatment stays greyed out until you have chosen a code, a quantity and a price.
- You cannot edit, delete or drag a treatment that has been invoiced or receipted.
More detail: Patient treatment history 2.
13. Move treatments between visits and mark them complete
You can drag treatments to the visit where they will be done and tick them off when completed.
Why this matters: plans change. A patient may want two fillings done today instead of next week. Moving the charge to the right appointment keeps the plan, diary times and charges honest. Ticking a treatment complete is what tells ChiralCloud it is ready to be charged or claimed.
Where to find it: the appointment list on Appointment Treatments.
How to
- To move a treatment, drag it by its row and drop it onto another appointment in the list.
- To mark work done, tick the box beside the treatment code. Its status changes to Not charged, meaning it is ready to invoice or commit.
- Untick it if you ticked it by mistake (it goes back to Saved).
- When everything for today is ticked, commit the appointment (NHS) or use Patient Sales, Credit and Cash Sales (private).
- Save on the toolbar.
Good to know
- Invoiced or receipted treatments cannot be dragged or unticked.
- The status column shows Saved, Scheduled, Not charged, or the invoice or receipt number.
- In NHS practice, completing all treatment and committing the last appointment is what ends the course and stacks the FP17. Don’t tick work you have not done.
More detail: Patient treatment history 2.