
Write and manage patient notes with templates, upload and file documents and images, control document locking, and use the image and composite editors.
Who it is for: practice managers and administrators, clinicians, dental nurses, receptionists.
In this guide:
- Write a patient note, using a template
- Find, edit, print and copy notes
- Upload documents, X-rays and photos
- Find, manage and archive documents on the Documents tab
- Unlock a document for editing and lock it again
- View, select and manage patient images
- Crop, straighten and label a clinical photo
- Build a composite of clinical photos
1. Write a patient note, using a template
You can add a note of the right type, insert a template note and know which types pop up as alerts.
Why this matters. Notes record what happened outside the clinical chart: a phone conversation about fees, a complaint, a safeguarding concern, a special request. Contemporaneous, factual notes protect the patient and the team if questions are asked later. Template notes make common notes quick and consistent.
Where to find it. Notes tab, the + button (Add Patient Note). Or Create a patient note on the toolbar.
How to
- Click Add Patient Note.
- Enter a Subject that says what the note is about.
- Choose a Type: Medical (Dental), Informational, Warning, Action or Complaint.
- Use Insert template to drop in a practice template note, then edit the text for this patient. Choosing a template copies its text; later changes to the template don’t affect your note.
- Write or finish the note and click OK.
Which notes pop up? Every type except Informational is saved as a pop-up, so it appears when anyone opens the record (and, for appointment notes, when the appointment opens). Use Warning for medical alerts and Action for things someone must do.
Good to know
- Write facts, not opinions, and never anything you wouldn’t want the patient to read: patients can request copies of their record.
- Template notes are managed by an administrator in Utilities › Template Notes (needs Edit Template Notes).
- Notes created automatically (for example by a bulk update or a mail shot with Add Note ticked) show here too.
More detail: Patient notes.
2. Find, edit, print and copy notes
You can read notes, edit or delete them if permitted, view or print note history and copy note text.
Why this matters. Notes build up over years. Being able to scan them, print them for a complaint response, or copy text into a letter saves time and avoids retyping errors.
Where to find it. Notes tab on the patient record. Notes also appear inside the appointment editor’s Notes tab.
How to
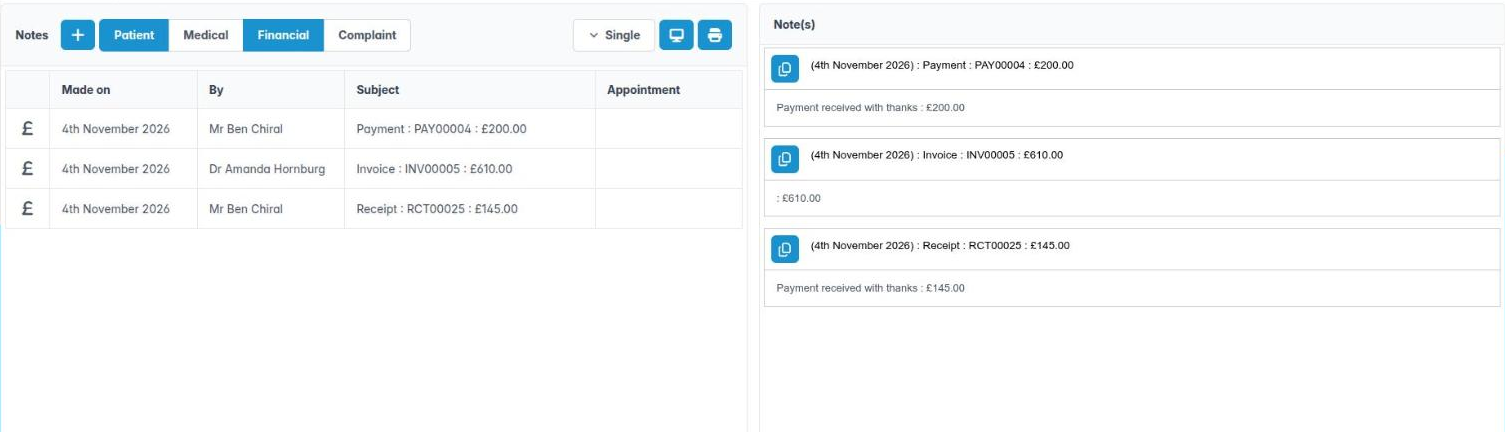
- Read the list: Made on, By, Subject and Appointment (if the note was made during an appointment). Select a note to read it in full.
- Right-click a note for:
– Edit Note to change it (opens Edit Patient Note),
– Delete Note to remove it (confirm Are you sure you want to delete this note?). - Click Show the patient note(s) to preview all notes as a report, or Print the patient note(s) to print them (Patient Note History).
- On a single expanded note, use Show the patient note or Print the patient note, and the copy icon to copy the note’s text to your clipboard.
Good to know
- Edit Note and Delete Note need the edit patient note permission (AID_EDIT_PATIENT_NOTE). Many practices give it to managers only, so that notes form a reliable record.
- Print Note and Show Note Appointment are in the right-click menu but are not yet working; use the print buttons above the list instead.
- If a note was wrong, it is usually better to add a correcting note than to delete the original.
More detail: Patient notes.
3. Upload documents, X-rays and photos
You can upload files to the record with the right classification and image type.
Why this matters. Referral letters, signed forms, intraoral photos and radiographs all belong in the patient’s record, filed so they can be found again. A clear classification (and, for photos, an image type such as “Upper occlusal”) makes them easy to find and lets the composite editor arrange them automatically.
Where to find it. Patient toolbar: Upload Patient Image / XRay / PDF for images and PDFs, Upload Patient Document for Word and other documents.
How to
- Click the upload button. The dialog shows the total size of your selection in its title.
- Choose or drag in one or more files.
- For each file pick its classification from the drop-down (for example Referral, Correspondence, Radiograph).
- For images, pick an Image type. Click Apply this image type to every image to set the same type on all of them in one go.
- Click upload and wait for the progress bar to finish.
Good to know
- Files over 20 MB are refused with Maximum file upload size exceded.
- If a file’s name doesn’t match its contents (for example a JPEG called .pdf) you’ll see File name doesn’t match the file with Rename and upload.
- With a connected scanner or X-ray software, the appointment and record screens offer Scan Patient Image (choose a Scanner, then Scan) and Connect to X-Ray Software (choose the XRay Software, then Connect).
- Classifications and image types are set up in Housekeeping › Document Classifications and Housekeeping › Image Types.
More detail: Patient documents.
4. Find, manage and archive documents on the Documents tab
You can find any document in either layout, open it, edit its details, email it, and archive or restore it.
Why this matters. The Documents tab is the patient’s filing cabinet. Knowing where each kind of document lands, and what you can do with it, means you can answer “did we get the referral letter?” in seconds.
Where to find it. Documents tab on the patient record.
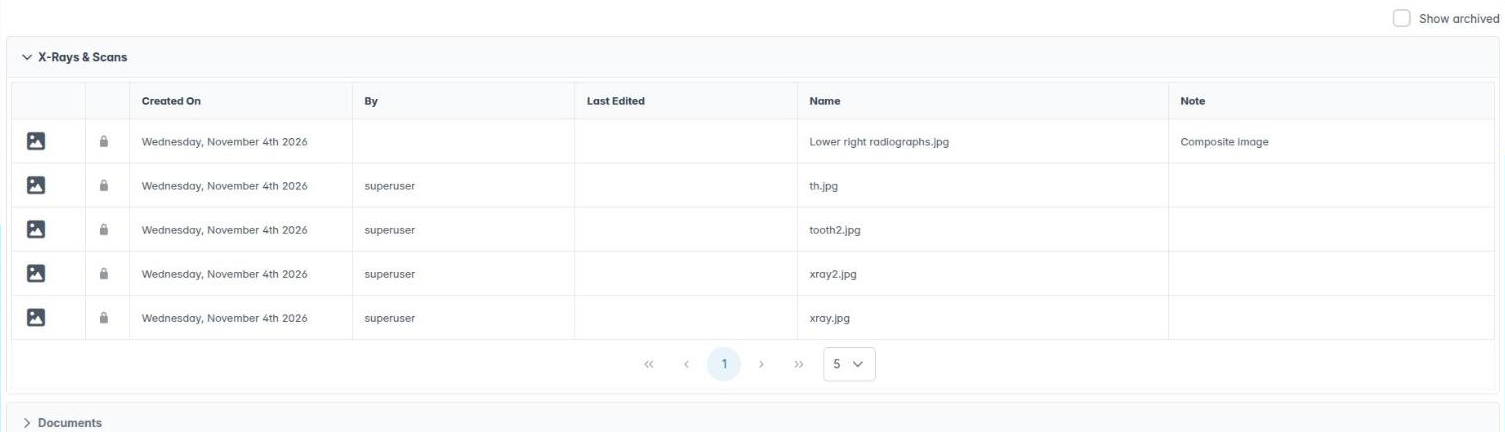
How to: folder layout (the default). Documents are grouped in sections: X-Rays & Scans, Documents, Prescriptions, Referrer Letters, Treatment & Payment Plans, SMS & Emails and Consent Forms. Each shows Created On, By, Last Edited, Name and Note.
How to: flattened layout. If your practice ticked Flatten under Preferences › Practice Details › Patient Document Layout, documents and images share one Documents & Images list with a Type (classification) column, plus separate Prescriptions, Treatment & Payment Plans, SMS & Emails and Consent Forms.
Then, in either layout
- Double-click a document to open it (Word documents open in the online editor; images and PDFs in a viewer).
- Right-click for the actions for that kind of document, for example Edit Document Information, Email Patient Document, Archive Patient Document; Print Prescription; Print Referral Document; Print Treatment Plan Document; Edit Xray / Scan.
- Edit Document Information lets you change the Name, Classification, notes and Image type.
- Any Email … action shows an Email Preview first. Click OK to send.
- To take a document off the list, right-click it and choose Archive … (for example Archive Patient Document, Archive Xray / Scan or Archive Prescription). You’ll be asked: Archive this document? It stays in the patient’s record and can be shown again with “Show archived”. Click Yes.
- Tick Show archived above the lists to see archived documents. They are greyed and tagged Archived. Right-click one and choose Restore Document to put it back.
Good to know
- SMS & Emails shows each message’s Delivery status and Attachments. Right-click for Edit SMS / Email.
- Documents are part of the medical record, so they are archived, never deleted. An archived document opens view only, and an email that attached it can still open it.
- The only thing on an archived document’s right-click menu is Restore Document. Restore it first if you need to edit or email it.
More detail: Patient documents.
5. Unlock a document for editing and lock it again
You understand why documents are locked and, with permission, can allow editing and re-lock.
Why this matters. A clinical record must not be changed silently after the event. ChiralCloud therefore files every patient document locked: it opens view-only. That protects letters, consent forms and reports from accidental or improper edits. Sometimes a genuine correction is needed (a typo in a referral letter before it is sent), so a trusted user can unlock it.
Where to find it. Documents tab, right-click a document. The lock column shows a padlock on each row.
How to
- Right-click the document. If you hold the Unlock patient documents for editing permission, the menu ends with Allow editing.
- Click Allow editing. The padlock opens and the document can now be edited when opened.
- Make the correction and save in the editor.
- Right-click the document again and choose Lock document to protect it once more.
Good to know
- The permission is AID_DOCUMENT_EDITING, granted in Utilities › User Capabilities. Without it you don’t see the option at all.
- A locked document can still be renamed, reclassified and annotated through Edit Document Information; only its content is protected.
- The Last Edited column shows when and by whom a document was last changed.
- Never edit a document the patient has already signed. Create a new version instead.
More detail: Patient documents.
6. View, select and manage patient images
You can select, download, archive, restore, retype and transfer images, set the patient photo and send images to a referrer.
Why this matters. Clinical photographs and radiographs are part of the record and are often needed for referrals, lab work or insurance. Keeping them correctly typed and with the right patient matters for both care and data protection.
Where to find it. Images tab on the patient record.
How to
- Right-click an image and choose Select image (or Deselect image). Use Select All / Deselect All for everything.
- With images selected you can:
– Download selected images to your computer,
– Transfer selected images(s) to another patient (pick the correct patient in the dialog; used when images were filed against the wrong person),
– archive them (the Archive selected images button, then Yes to Archive the selected image(s)? It stays in the patient’s record and can be shown again with “Show archived”.),
– Send to referrer as document attachment, then pick the covering letter in Select Referrer Document. - Right-click a single image for Edit selected image, Archive this image, Set image type…, Use as Patient Photograph (confirm) or Send to referrer as document attachment.
- Tick Show archived to see archived images. They are faded and tagged Archived. Right-click one and choose Restore Document to bring it back.
Good to know
- Images are never deleted: an archived image stays in the patient’s record, it just leaves the gallery, the chart’s image tray and the pickers until you restore it.
- The patient photograph appears on the Personal tab and in Find Patients, which helps reception confirm identity.
- Downloading images puts patient data on your computer. Delete local copies once you’ve finished with them.
More detail: Patient images.
7. Crop, straighten and label a clinical photo
You can edit a copy of an image in the image editor and save it without changing the original.
Why this matters. Intraoral photos are often taken at an angle or with a cheek retractor in shot. A quick crop and straighten makes them useful for patient education, referrals and before-and-after comparisons. ChiralCloud saves an edited copy, so the original evidence is never altered.
Where to find it. Images tab, right-click an image and choose Edit selected image. The editor opens in its own tab on the record.
How to
- Pick a tool from the left palette: Crop, Straighten, Text, Rotate left, Rotate right, Mirror left–right, Mirror top–bottom or Zoom & pan.
- Crop: drag the frame, then Apply (or Cancel). Clear crop removes it.
- Straighten: use the slider (double-click it to reset).
- Text: Add text offers Patient name, Date of birth, Patient ID, Name, DOB & ID, Today’s date or Custom text…. Remove deletes the selected text.
- Use Zoom in, Zoom out and Fit to inspect detail (double-click the picture to fit).
- Undo (Ctrl+Z), Redo (Ctrl+Shift+Z) and Reset are on the toolbar.
- Click Save. The first save creates an edited copy; later saves update that copy.
Good to know
- An edited tab shows a marker in its title until saved. Closing it asks Discard the unsaved edits?
- Mirror is useful for photos taken with a mirror, which are reversed.
- Each tool’s properties panel has its own Reset.
More detail: Patient images.
8. Build a composite of clinical photos
You can create a composite from a layout, auto-place images by type, adjust cells and save or download it.
Why this matters. A composite (montage) puts a standard set of views on one page: for example the orthodontic set of extraoral and intraoral photos, or before-and-after shots. It is ideal for case presentations, referrals and treatment records.
Where to find it. Images tab, New composite. To change an existing one, right-click it and choose Edit composite.
How to
- Choose a layout from the left panel. Layouts are made by an administrator in Housekeeping › Composite Layouts.
- Click Auto-place. Each cell with an image type is filled with the newest image of that type. Use Use images from… to choose a date, or Use every image, whatever its date.
- Drag images from the tray onto cells to swap or fill them. In the tray use Filter the images and Set image type… on any image.
- Select a cell to adjust it in the cell panel (Reset the position, Clear the cell). Right-clicking a cell offers Clear cell. Splitting and joining cells is done when the layout is designed in Housekeeping › Composite Layouts — see Editing clinical images and building composites.
- Undo (Ctrl+Z) and Redo (Ctrl+Y) are available; Clear all empties every cell after Clear every cell?
- Click Save and give it a name, or use the arrow for Save as new, Download JPEG or Download PNG.
Good to know
- Switching layout keeps placed images where it can; if some would be lost you’re asked Change layout?
- Changing rows or columns in the layout panel asks Change the grid size.
- Delete this composite removes the composite. The montage image it produced is archived, so it stays in the patient’s record, and the photographs it was built from are not affected.
More detail: Patient images.