
A dental nurse’s session in ChiralCloud, from setting up the surgery to handing back to reception, with pointers to the modules that teach each part.
Who it is for: dental nurses.
In this guide:
- What ChiralCloud does for a dental nurse
- Set up the surgery: your clinician’s diary
- Chairside: open the appointment, check history, chart and notes
- Record X-rays and sedation, and raise lab work
- Hand back to reception and follow up
1. What ChiralCloud does for a dental nurse
You can explain how ChiralCloud supports a dental nurse’s work in surgery.
Why this matters As a dental nurse you are the clinician’s second pair of hands, and often their scribe. ChiralCloud is where the surgery’s record of each visit lives: the chart, clinical notes, medical history, radiographs, sedation records and lab work. Records you help create must be accurate, made at the time and attributable to the right person. That’s a GDC standard for the whole dental team, and it protects patients and the practice if a complaint or claim arises.
Where to find it The surgery computer, on your practice’s ChiralCloud web address. Sign in as yourself, not as the dentist.
What you’ll do most days
- Get the surgery’s diary ready for the session.
- Open each patient’s appointment and check their medical history with the clinician.
- Record charting and notes as the clinician dictates.
- Record radiographs taken and sedation given.
- Raise and track lab work.
- Hand the patient back to reception with treatment recorded, ready to charge.
How this course is organised The next steps walk through a nurse’s session. Each part names the module that teaches it. Start with Signing in and your account and Finding your way around.
Good to know
- Your permissions may not let you do everything a clinician can, such as completing NHS claims. That’s normal.
- Notes you type are recorded under your login. If you are writing for a dentist, say so in the note if your practice asks you to.
More detail: Chiraldocs.hopto.org.
2. Set up the surgery: your clinician’s diary
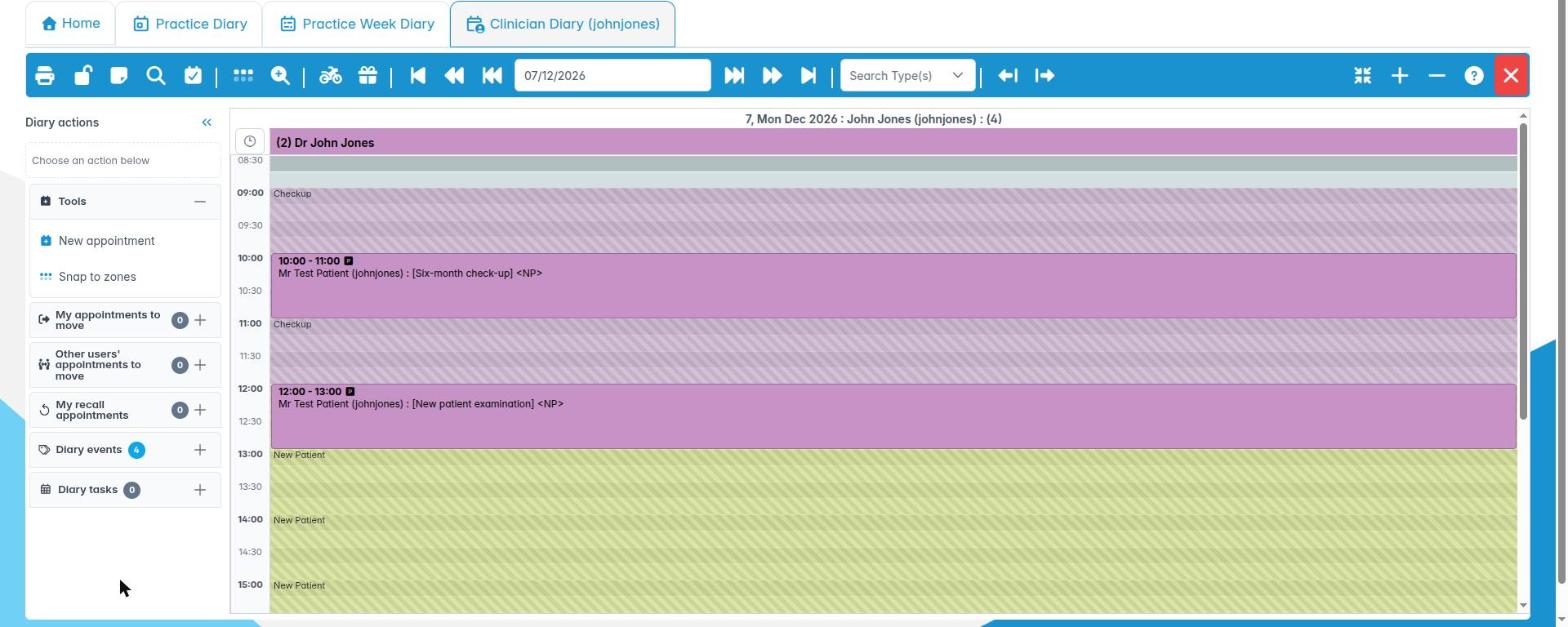
You can open your clinician’s diary and see who’s coming in and when they’ve arrived.
Why this matters Knowing what’s coming lets you set up the right instruments and materials, and spot problems early, such as lab work not back for today’s fit or a patient needing sedation.
Where to find it Home › Clinician Diary, or Diary › Clinician Diary in the left menu.
How to
- Sign in as yourself. Taught in: Signing in and your account.
- Press Clinician Diary, choose your dentist or hygienist from the Clinicians list and press OK. The tab is named after them. Taught in: Finding your way around the diary.
- Read the session. Check appointment types and lengths, notes on the appointments, and any patients flagged with alerts. Taught in: Finding your way around the diary.
- Check lab work due back today. Laboratories › Lab Work Reports › Due lists it, and the diary may prompt you about lab work. Taught in: Lab work.
- Watch for patients marked as arrived by reception or the kiosk. The appointment changes in the diary, and some practices also hear an arrival chime.
Good to know
- Keep the clinician’s diary open in its own tab all session and open patients alongside it.
- If your screen locks between patients, type your password to carry on.
- You may be able to move appointments in the diary, but agree changes with reception so the front desk isn’t surprised. Taught in: Changing, cancelling and rebooking appointments.
More detail: The clinician diary.
3. Chairside: open the appointment, check history, chart and notes
You know how to open a patient’s appointment and support the clinician with medical history, charting and notes.
Why this matters Before any treatment the clinician must confirm the medical history is current. Then the visit is recorded as it happens: what was found, what was done and what was discussed. Good contemporaneous notes, including consent discussions, are the practice’s best protection under the Montgomery consent standard.
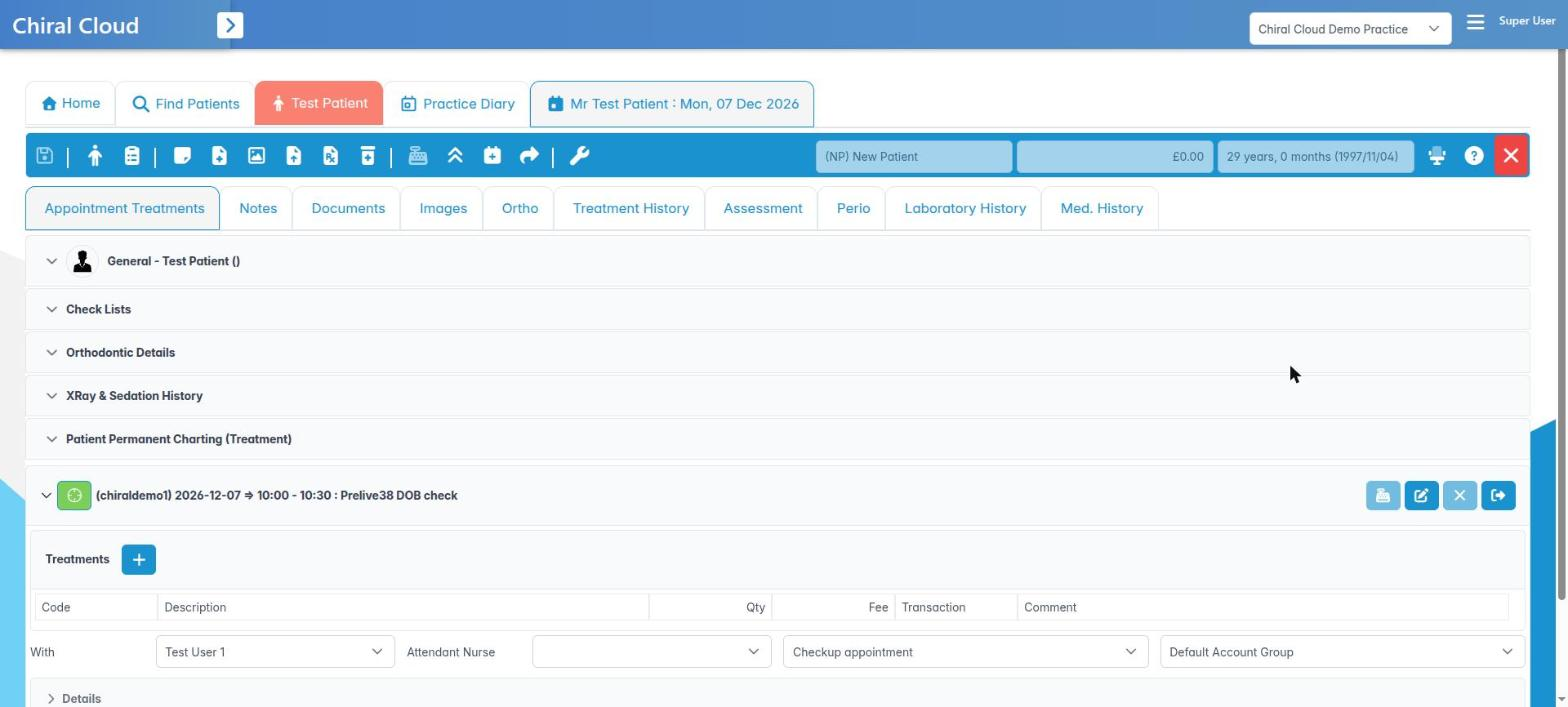
Where to find it Right-click the appointment and choose Goto Appointment. This opens the appointment editor.
How to
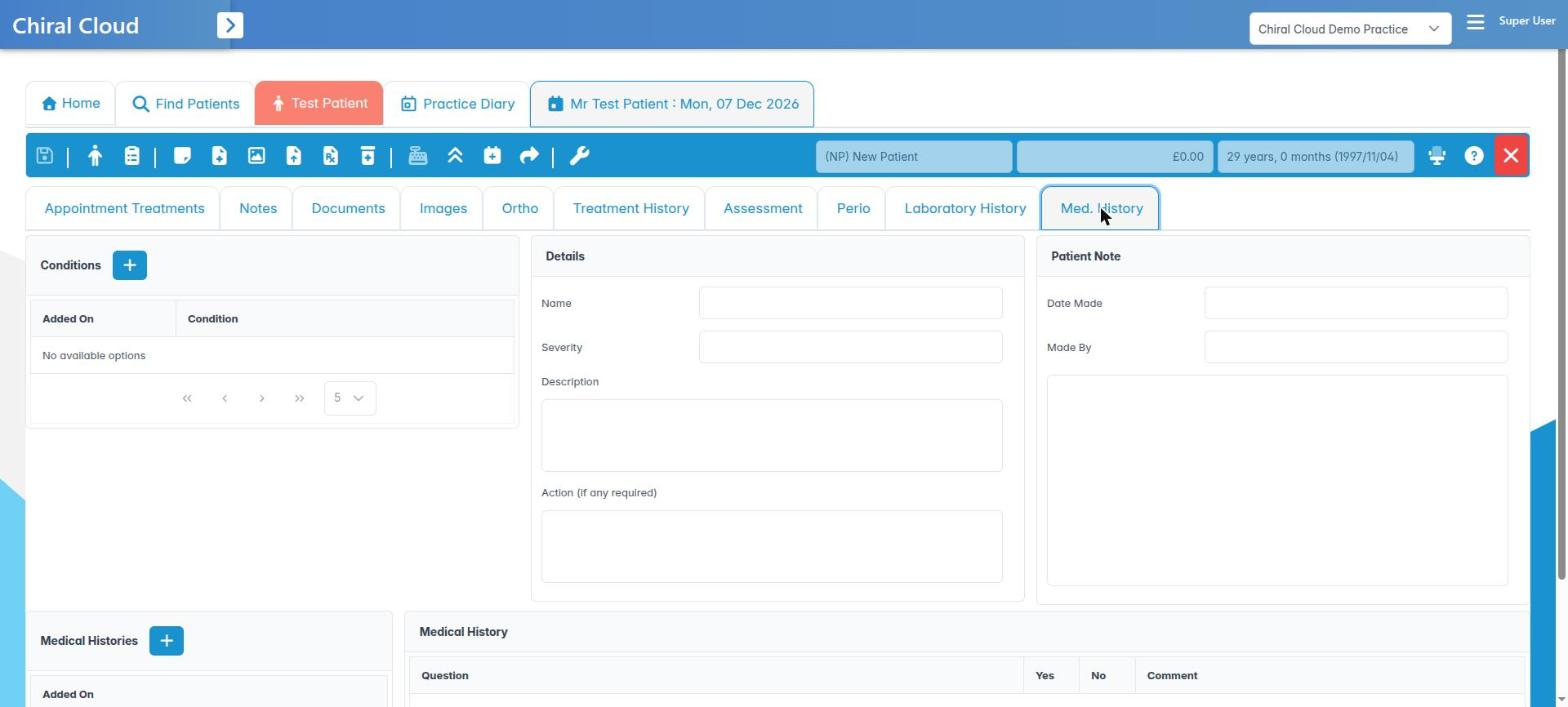
- Open the appointment. The editor opens on Appointment Treatments, which holds the chart. Other tabs include Notes, Med. History, Treatment History, Perio and Laboratory History. Taught in: The appointment editor.
- Medical history. Check the patient’s latest history with the clinician and record any changes, such as new medications or allergies. Taught in: Medical history and consent.
- Charting. As the dentist calls out findings and treatment, chart them on the tooth chart, including existing work at an examination. Taught in: Charting.
- Perio charting. Record pocket depths and bleeding during a periodontal examination. Taught in: Periodontal charting.
- Notes. Use Template Notes to write quick, consistent notes, then add anything specific. Taught in: Clinical notes and templates.
- Check lists. Tick the practice’s check lists, such as a pre-sedation or new-patient list, in the appointment’s check lists panel. Taught in: The appointment editor.
Good to know
- NHS and mixed practices only: the clinician chooses the NHS band and completes the claim. Don’t guess it.
- Save as you go. An unsaved appointment shows \* on its tab.
More detail: Patient notes.
4. Record X-rays and sedation, and raise lab work
You know where radiograph, sedation and lab work records are made and which modules teach them.
Why this matters Every radiograph must be justified, graded and reported under IRMER (the Ionising Radiation (Medical Exposure) Regulations), and sedation needs a full record of drugs, doses and monitoring. These records are checked in clinical audits and CQC inspections. Lab work must be tracked so the patient’s fit appointment isn’t wasted.
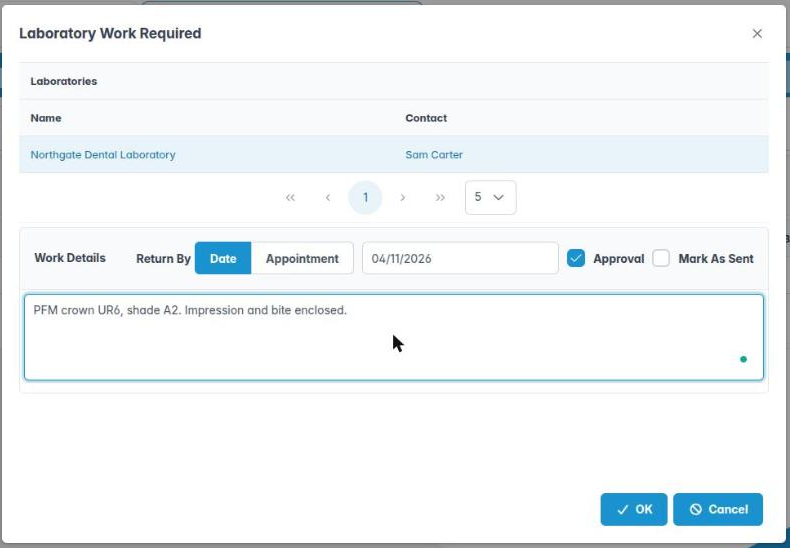
Where to find it In the appointment editor, the XRay & Sedation History panel on Appointment Treatments, and the Laboratory History tab.
How to
- X-rays. Press Add New Patient Xray Record to record the type, justification and quality grade. You can also attach or view the image. Practices with X-ray software can link to it. Taught in: X-rays and sedation.
- Sedation. Press Add New Patient Sedation Record for each sedation appointment. Taught in: X-rays and sedation.
- Reports. Compliance › XRay Reports and Sedation Report summarise records for audit. Taught in: X-rays and sedation.
- Lab work. Raise a lab work request from the appointment, then track it through Lab Work Pickup, Lab Work Returned and approval. Taught in: Lab work.
- Images and documents. Add intra-oral photos and scanned documents to the patient’s Images and Documents tabs. Taught in: Notes, documents and images.
Good to know
- Record the radiograph on the day it’s taken, under the clinician who took or prescribed it.
- If lab work comes back while you’re busy, mark it returned so reception knows the fit appointment can go ahead.
More detail: Chiraldocs.hopto.org.
5. Hand back to reception and follow up
You know what should be done in ChiralCloud before the patient leaves the surgery.
Why this matters When the patient walks out, reception needs everything ready: treatment recorded so it can be charged, the next appointment needed, and any message for the front desk. A clean hand-over stops patients waiting at the desk while someone runs back to surgery.
Where to find it The appointment editor, the patient’s Tasks tab and Users › Tasks & Reminders.
How to
- Finish the record. Check the treatment done today is charted and marked complete, and the notes are saved. Then reception can charge it. Taught in: Charging for treatment and issuing invoices.
- Next visit. If the clinician has written a treatment plan, reception can place its appointments in order. Taught in: Treatment plans and estimates, and Booking appointments.
- Recall. Make sure the clinician has set the recall interval for the patient’s risk. Taught in: Recalls and reminders.
- Leave a task. Need reception to do something, such as book a 30-minute appointment in 2 weeks or send an aftercare leaflet? Create a task for them. Taught in: Team tasks and messaging.
- Messaging. If your practice uses Messaging, send a quick message to the front desk instead of walking out of surgery. Taught in: Team tasks and messaging.
Good to know
- Close the patient’s tabs when you’re done, so the next patient isn’t confused with the last. Save first.
- Check the Tasks & Reminders badge between patients. A colleague may need you.
