A receptionist’s day in ChiralCloud, from opening the diary to the end-of-day cash book, with pointers to the modules that teach each part.
Who it is for: receptionists.
In this guide:
- What ChiralCloud does for the front desk
- Open up: sign in, open the diary and check the day
- Check patients in and keep their details current
- Book, move and cancel appointments
- Take payments and close the day
- Bring patients back: recalls, reminders and messages
1. What ChiralCloud does for the front desk
You can explain what ChiralCloud does for a dental practice and which parts a receptionist uses most.
Why this matters Reception is where every patient’s visit starts and ends. ChiralCloud is the practice’s single system for that journey: the appointment diary, patient records, medical history forms, payments, NHS paperwork, recalls and reminders. It runs in a web browser, so the front desk, the surgeries and the practice manager all see the same live information. When you book a patient, the dentist sees it in their diary straight away.
Where to find it Your practice’s ChiralCloud web address, on any computer or tablet at the practice.
What you’ll do most days
- Open the Practice Diary and see who is coming in.
- Mark patients as arrived and make sure their medical history is up to date.
- Book, move and cancel appointments.
- Register new patients as NHS or private.
- Take payments and give receipts.
- Chase recalls and send reminders so patients come back when they should.
How this course is organised The rest of this module walks through a receptionist’s day. Each part points you to the module that teaches it properly. Start with Signing in and your account and Finding your way around, then follow the diary and patient modules in order.
Good to know
- What you see depends on your permissions, set by your practice administrator. If a colleague has a button you don’t, that’s normal.
- Some steps only apply at NHS or mixed practices. These are clearly marked, so ignore them if your practice is fully private.
More detail: Chiraldocs.hopto.org.
2. Open up: sign in, open the diary and check the day
You know the first things a receptionist does in ChiralCloud each morning.
Why this matters A calm morning starts with knowing the day ahead. Who’s in, which clinicians are working, any gaps for emergencies and any tasks left for you yesterday.
Where to find it Home › Practice Diary, and Users › Tasks & Reminders.
How to
- Sign in with your own user name and password, and your two-step code if your practice uses one. Taught in: Signing in and your account.
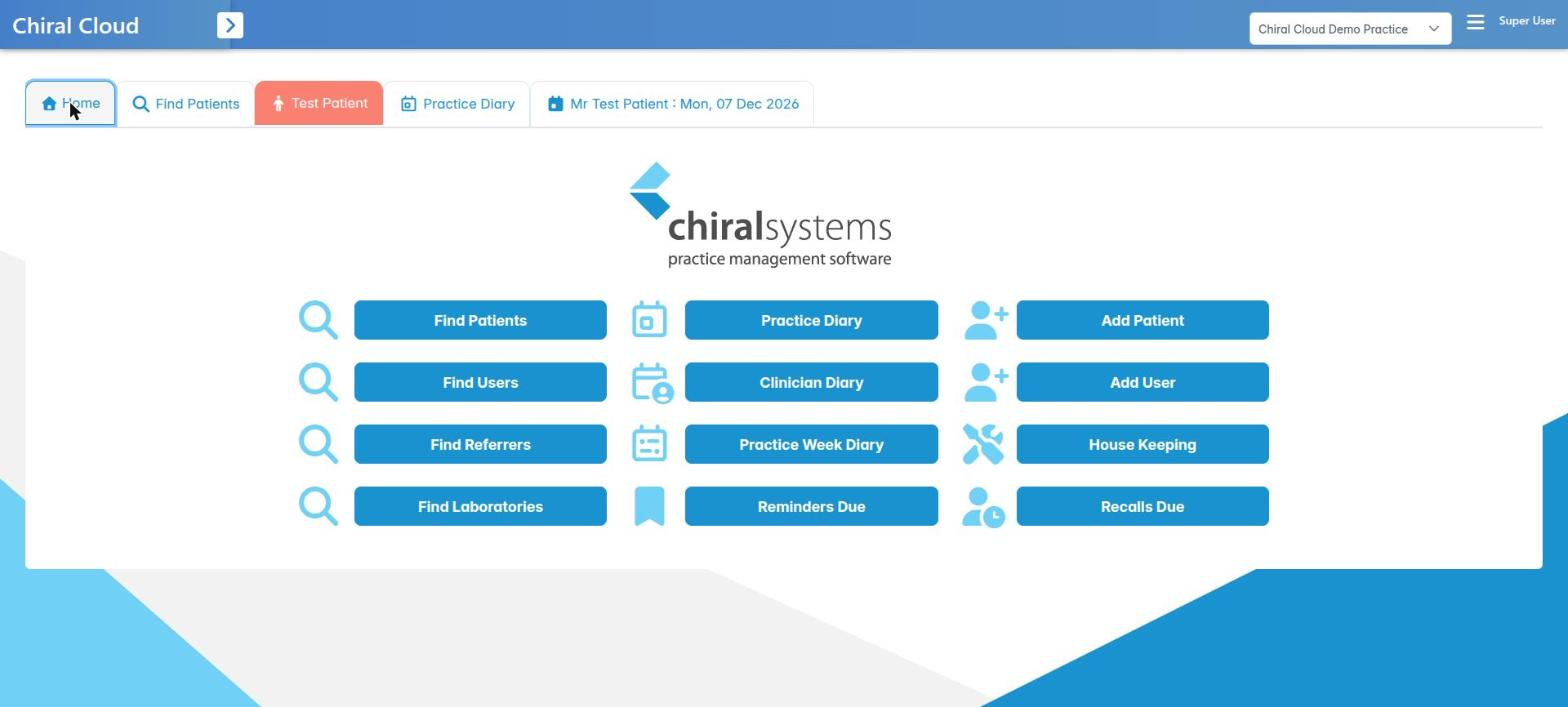
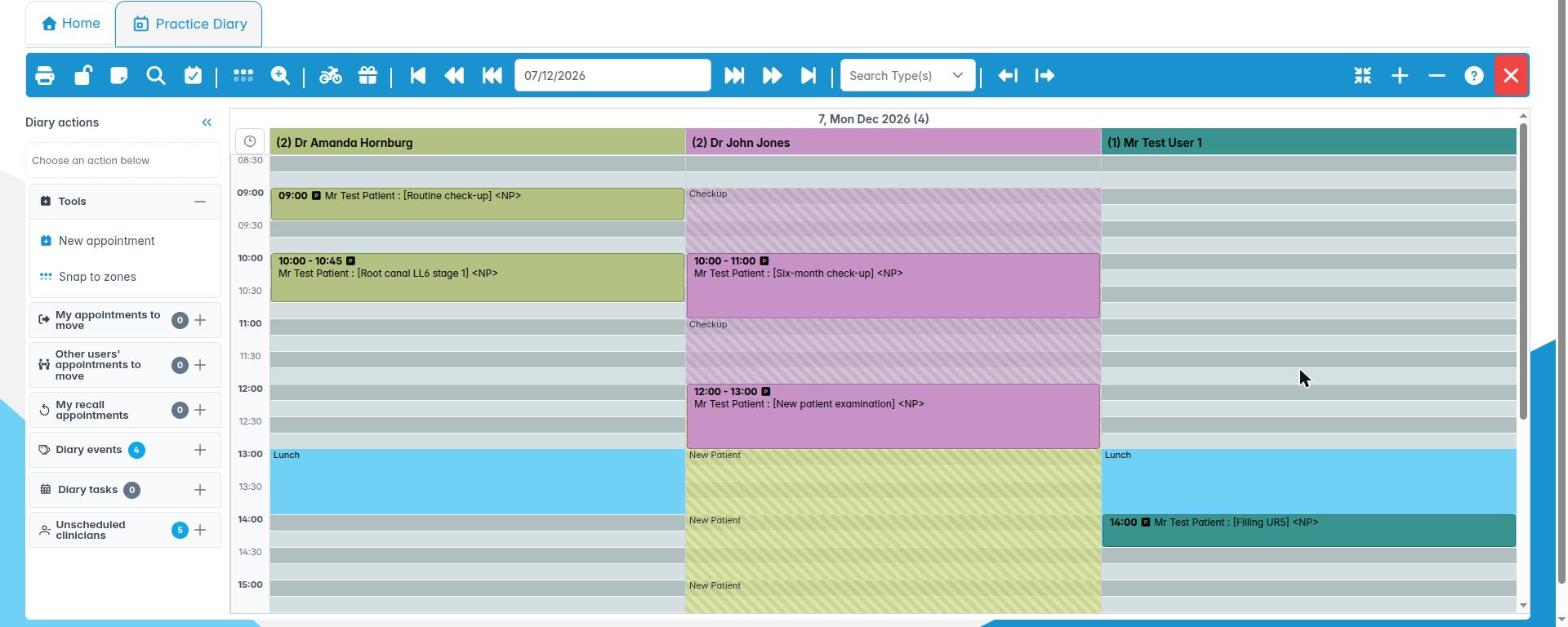
- On the Home tab, press Practice Diary. It opens on today with a column for each clinician working. Taught in: Finding your way around the diary.
- Scan the day. Look for gaps that could take an emergency, double-bookings, patients flagged as needing longer, and any diary notes left for the day.
- Check for a number badge on Tasks & Reminders, for example a colleague asking you to phone a patient. Taught in: Team tasks and messaging.
- Print the day list for a clinician if your practice still uses paper at the chairside: right-click the clinician’s column heading and choose Print Day List.
Good to know
- Keep the diary tab open all day and use the other tabs alongside it. You never need to close it to look up a patient.
- If your screen locks while you’re away from the desk, type your password to carry on where you left off.
- Your practice may have set up the Practice Control Centre differently, so learn where your own buttons are.
More detail: The practice diary.
3. Check patients in and keep their details current
You know what to check when a patient arrives and where each check is taught.
Why this matters A clinician must check a patient’s medical history before treatment, and your record of who attended matters for missed-appointment policies and NHS claims. Checking a patient in properly also keeps their contact details and consents up to date under UK GDPR.
Where to find it Right-click the patient’s appointment in the Practice Diary.
How to
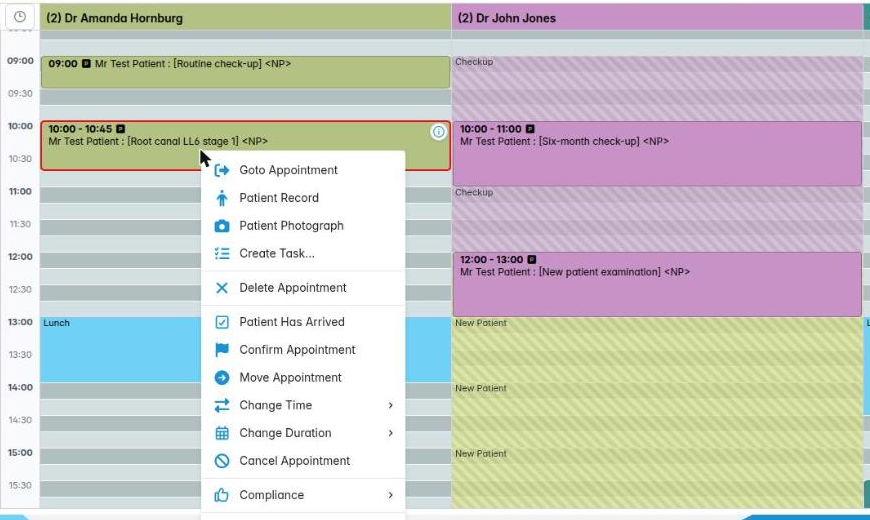
- When the patient arrives, right-click their appointment and choose Patient Has Arrived. The clinician’s diary updates so the surgery knows they’re here. Patients can also check themselves in at a kiosk. Taught in: The appointment day.
- Confirm their address, mobile and email. Right-click the appointment, choose Patient Record, then use the Personal tab. Taught in: Finding your way round the patient record.
- Make sure the medical history is current. Most practices ask for it at every course of treatment, and at least once a year. Patients can fill it in on a practice tablet or online before they come. Taught in: Medical history and consent, and Tablets and the check-in kiosk.
- For a new patient, register them as NHS or private before their first visit. Taught in: Finding and registering patients.
- If a patient doesn’t turn up, record it as a failed attendance rather than deleting the booking. Taught in: Changing, cancelling and rebooking appointments.
Good to know
- NHS and mixed practices only: NHS patients sign a patient declaration and may claim free or reduced-cost treatment. Check their exemption evidence at the desk. Taught in: Registering NHS patients.
- Never discuss a patient’s details where others in the waiting room can hear.
More detail: The practice diary.
4. Book, move and cancel appointments
You know the booking jobs a receptionist does and which modules teach them.
Why this matters Most of a receptionist’s day is diary work: phone calls asking for appointments, patients wanting to move, and urgent patients needing to be seen today. Good diary work keeps clinicians busy without overbooking, and keeps patients happy.
Where to find it The Practice Diary, the Clinician Diary and Patients › Find Patients.
How to
- Find the patient first. Use Find Patients to check you have the right person, using date of birth and postcode, not just the name. Avoid creating a duplicate record. Taught in: Finding and registering patients.
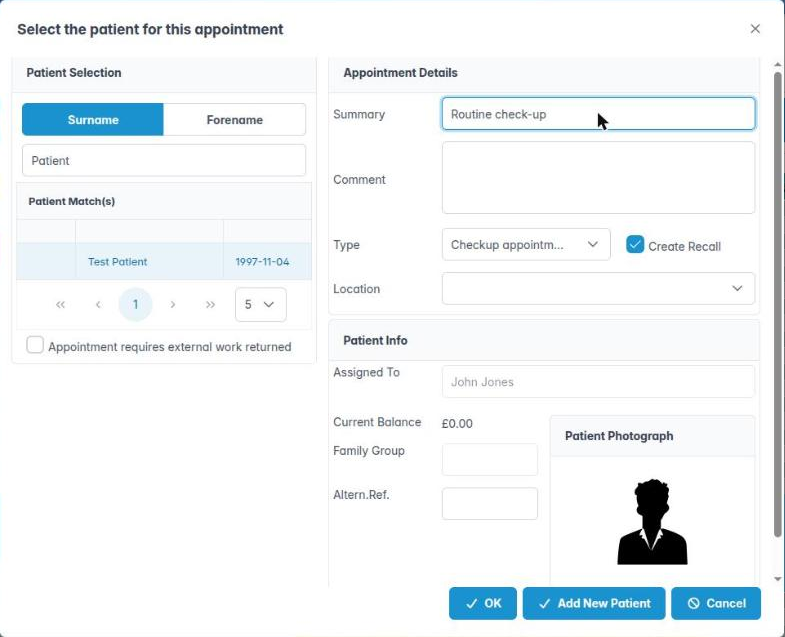
- Book by selecting an empty slot in the diary, choosing the patient and the appointment type. Use booking zones for urgent and examination slots. Taught in: Booking appointments.
- Book planned treatment. When a dentist has written a treatment plan, place its appointments in the diary in the right order. Taught in: Booking appointments.
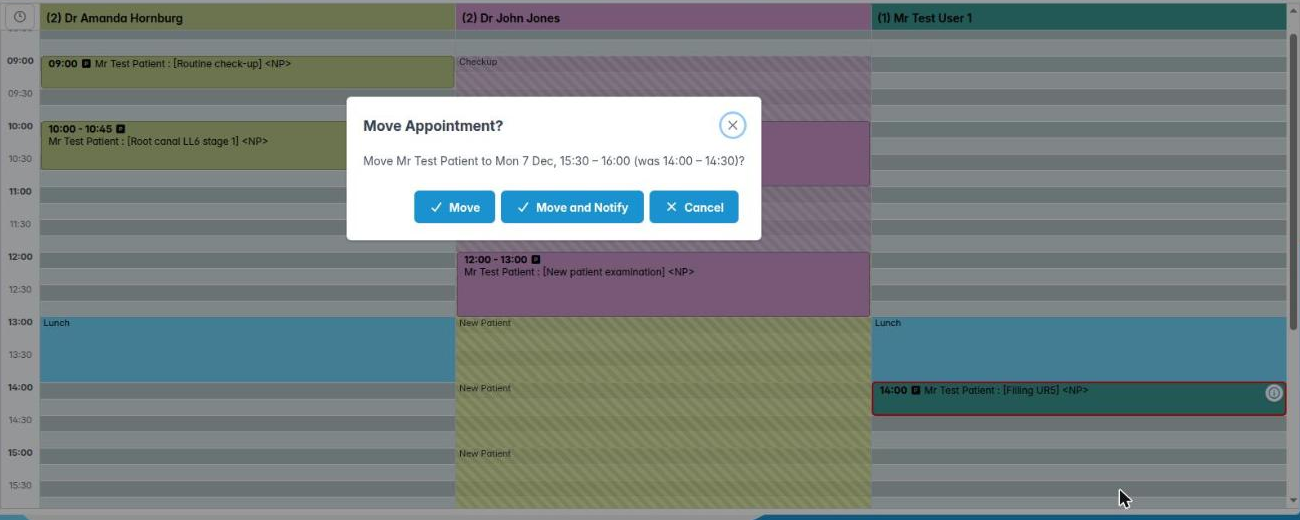
- Move or change an appointment by dragging it, or with Change Time and Change Duration. Use the move list to rebook it to another day. Taught in: Changing, cancelling and rebooking appointments.
- Cancel with a reason, so late cancellations can be reported and your practice’s policy applied. Taught in: Changing, cancelling and rebooking appointments.
- Online bookings and video appointments appear in the diary too, if your practice offers them. Taught in: Online bookings and video appointments.
Good to know
- Use Practice Week Diary to find a slot across the week when a patient says “any time next week”.
- A confirmation text or letter cuts missed appointments. Taught in: Appointment reminders and confirmations.
More detail: The practice diary.
5. Take payments and close the day
You know how charges reach the desk, how payments are taken and what to check at the end of the day.
Why this matters When the patient comes out of surgery, the clinician has already recorded what was done. Your job is to charge it correctly, take payment and give a receipt. At the end of the day, the takings in ChiralCloud must match the card machine and the cash drawer.
Where to find it The patient’s Account tab, the appointment’s sales screen and Reports › Revenues › Daily Cash Book.
How to
- Charge the visit. Private patients: complete the sale from the appointment, which turns the treatment into an invoice. Taught in: Charging for treatment and issuing invoices.
- NHS and mixed practices only: for NHS patients, Commit Appointment to collect the correct NHS patient charge band, unless the patient is exempt. Taught in: Charging for treatment and issuing invoices.
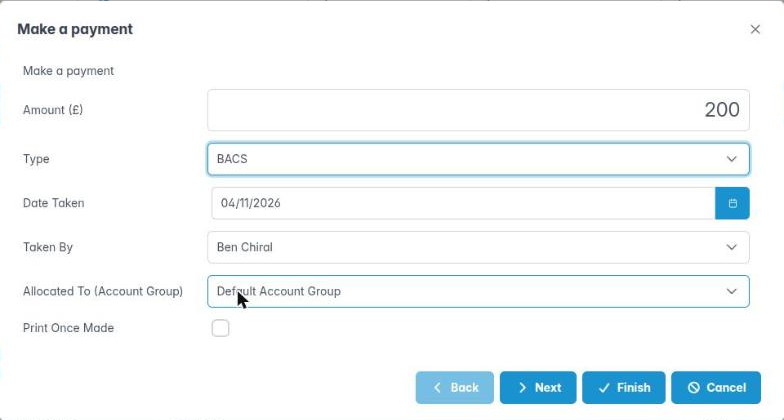
- Take payment by card, cash or another method, and print or email the receipt. Take deposits or payments on account as your practice requires. Taught in: Taking payments.
- Check the account. Make sure the balance shown on the patient’s Account tab is what you expect before they leave. Taught in: Reading a patient account.
- Payment plans and memberships (mainly private practices): monthly plans are set up and invoiced from the patient’s record. Taught in: Payment plans.
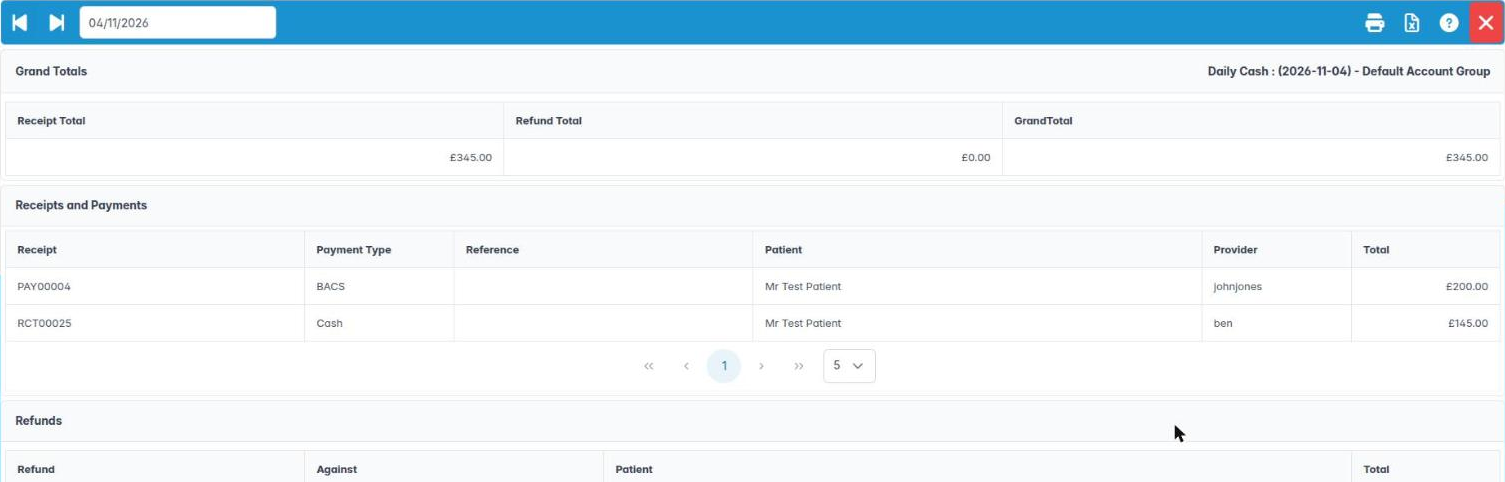
- End of day: run the Daily Cash Book and check it against your card machine and cash totals. Taught in: Daily and period financial reports.
Good to know
- Never delete or edit a payment to “fix” it. Corrections such as voids and refunds are done by an administrator and leave an audit trail. Taught in: Correcting accounts: voids, credits, refunds and adjustments.
- Your permissions decide which payment actions you see.
More detail: Account history.
6. Bring patients back: recalls, reminders and messages
You know how ChiralCloud helps you recall patients and send reminders, and where to learn each part.
Why this matters A practice depends on patients returning for check-ups. NICE guidance (CG19) says recall intervals should be set by the dentist from each patient’s risk, anywhere from 3 to 24 months for adults. Reception turns those intervals into appointments. Reminders before each visit cut missed appointments and wasted surgery time.
Where to find it Patients › Recalls Due, Recall Management, Reminders Due and Mail Shots. Recalls Due and Reminders Due are also on the Practice Control Centre.
How to
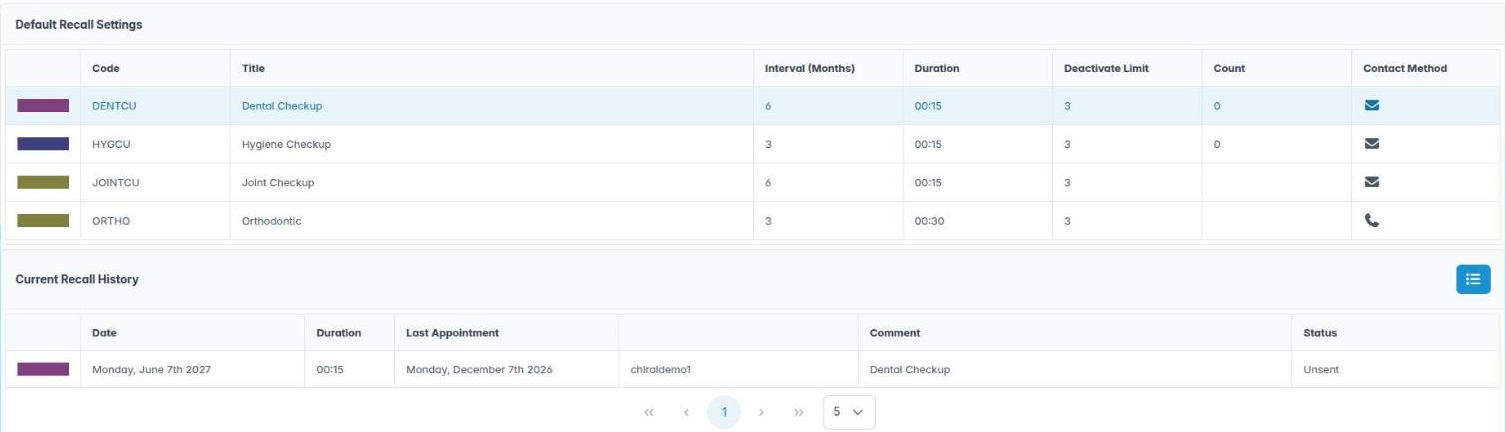
- Recalls Due lists patients whose check-up or hygiene recall is due. Send recall letters, texts or emails from here, and book the ones who reply. Taught in: Recalls and reminders.
- Recall Management tracks patients through first, second and third reminders, so nobody slips through. Taught in: Recalls and reminders.
- Reminders Due sends appointment reminders for upcoming bookings by text or email. Taught in: Recalls and reminders.
- Mail Shots send one email, text or form to a group of patients, for example new opening hours. Taught in: Patient communications.
- Patient forms and the portal. Send medical history and consent forms online, and let patients see their appointments. Taught in: Patient communications.
Good to know
- Only contact patients by the methods they’ve agreed to, and respect their marketing preferences. This is a GDPR requirement.
- Texts use your practice’s SMS credit. Your administrator can check the balance under Reports › SMS Limits.
- If a reminder can’t be sent, for example because an email bounced, a notice tells you while the screen is open.
More detail: Recall settings.