
Chiral Cloud 2.0.76 has a new dental chart. You chart with the Tooth Dial: click a tooth, choose what to chart and the material, and it is charted straight away, with no dialog. The chart checks each item against what is already on the tooth, so it can’t be charted where it can’t go. This guide takes you through the basics.
The pictures use a made-up test patient in a demo practice that numbers teeth 1–32 (American Universal). Your chart uses the Tooth Numbering Scheme set in Preferences › Charting Systems: British (for example UR6), American Universal or European (FDI).
1. Finding the chart
Open the patient’s appointment and, on Appointment Treatments, open Patient Permanent Charting. The same chart appears on the treatment plan.
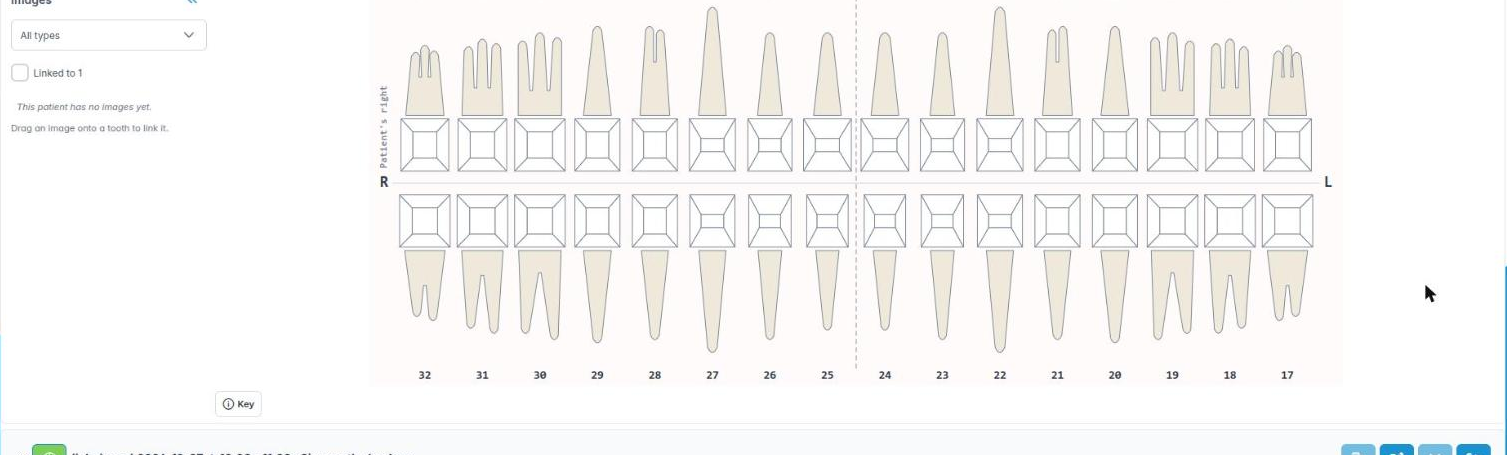
Along the top of the chart:
- Adult | Child switches between the adult and child chart.
- Existing | Treatment chooses what you are charting: work the patient already has (Existing), or treatment you are planning (Treatment). The chart’s title says which, for example Patient Permanent Charting (Existing work).
- Undo (the curved arrow) takes back your last change. See Undo below.
- Dial turns your Tooth Dial off or on. With it off, the palette is shown beside the chart instead.
- The button on the right of the hint arranges My Tooth Dial: the items on your own dial’s inner ring.
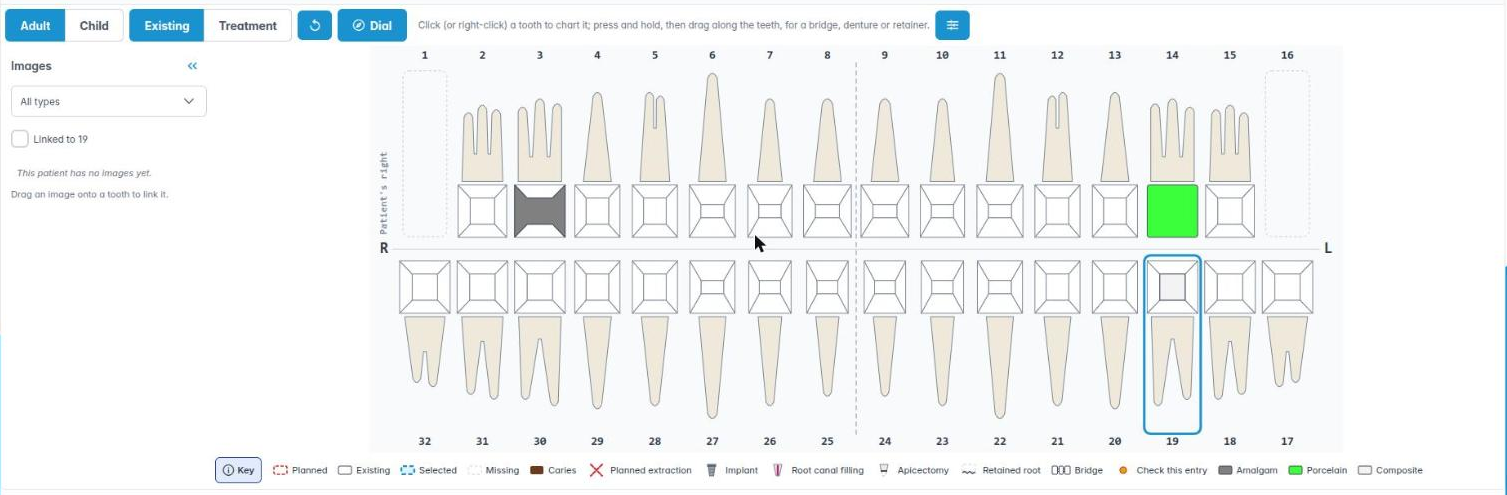
Each tooth has its crown surfaces and the right number of roots. A midline, the quadrant lines and R / L show the patient’s right and left. Existing work has a solid outline, and planned work a red dashed outline.
Click Key under the chart to show what the drawing means: planned, existing, selected, missing, caries, a planned extraction, an implant, a root canal filling and so on, and the materials in use. It stays the way you leave it.
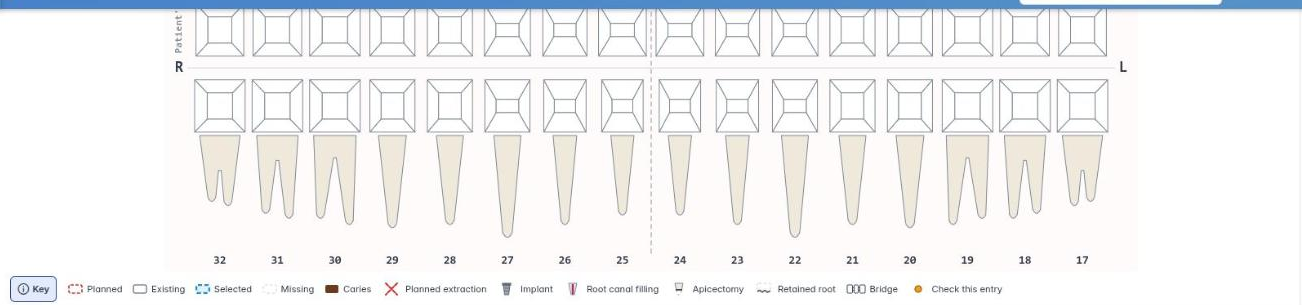
2. Charting with the Tooth Dial
Click a surface of a tooth (or right-click it). The Tooth Dial opens beside the tooth, above or below it so the tooth stays in view. The centre names the tooth and surface, for example 3 O · Existing work.
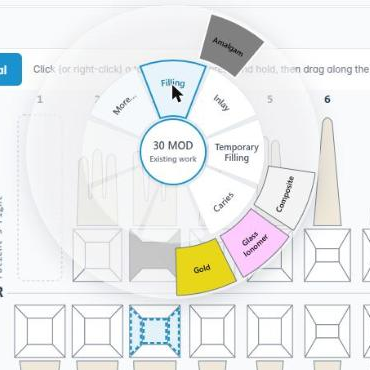
The inner ring has what can go on that surface, such as Filling, Inlay, Temporary Filling and Caries. More… lists everything else, with a filter box.
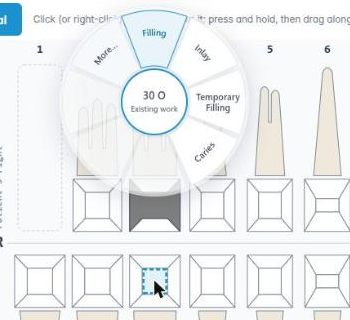
To chart several surfaces, press on one surface and drag across the others, then let go. The surfaces you crossed get a blue dashed outline, and the centre names them, for example 3 MOD.
Choose the item, then the material on the next ring. The item is charted at once.
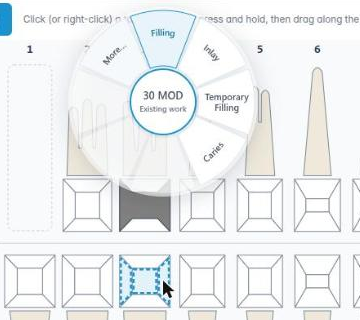
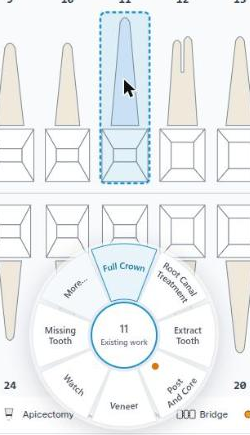
Click the root or the whole tooth for the items that go on the whole tooth: Full Crown, Root Canal Treatment, Extract Tooth, Post And Core, Veneer, Watch and Missing Tooth.
An item with an amber dot is allowed but unusual; it asks Yes or No before it is charted. After your first item, the centre of the dial offers Again to repeat it on the next tooth.
For speed, you can press on a tooth and flick towards the item you want: letting go on it charts it.
3. Recording existing work
Click Existing and chart what the patient already has. Each entry is listed under Existing work below the chart, with the date, the entry, the tooth and surfaces, the material and who charted it.

4. Planning treatment
Click Treatment and chart the work you are planning in the same way. When a material has more than one treatment code, a third ring shows the codes with their descriptions; choose the one you want, for example ES Extraction simple.
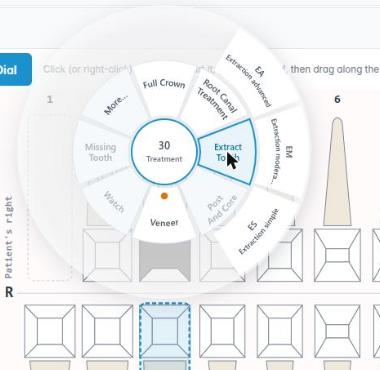
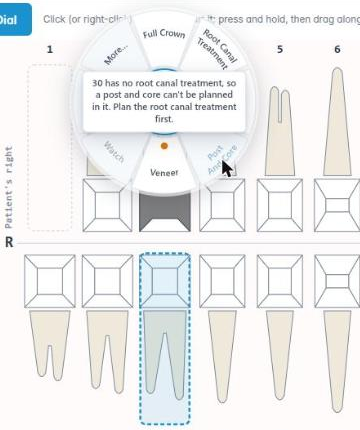
The dial checks each item against what is on the tooth. An item that can’t go there is greyed out; click it to see why. For example, a post and core can’t be planned before the root canal treatment.
When planning, the checks include work already planned: a tooth planned for extraction counts as gone, and a crowned tooth is not offered fillings.
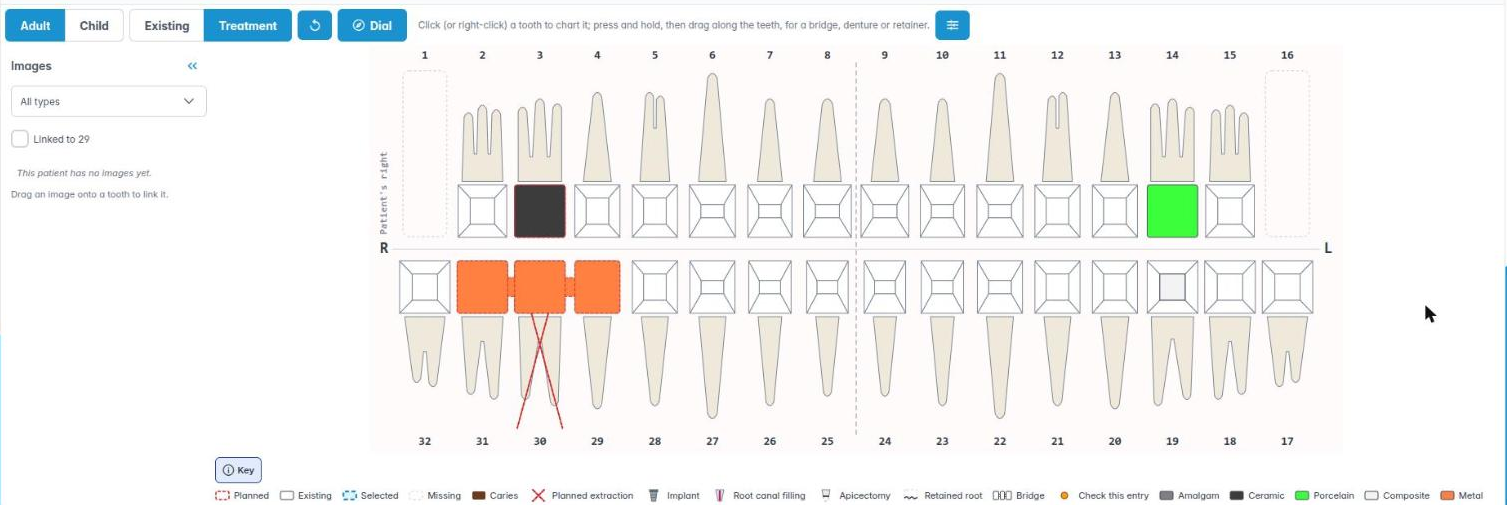
Each planned item is added to the appointment’s Treatments with its code, description, tooth and fee:

5. Bridges, dentures and retainers
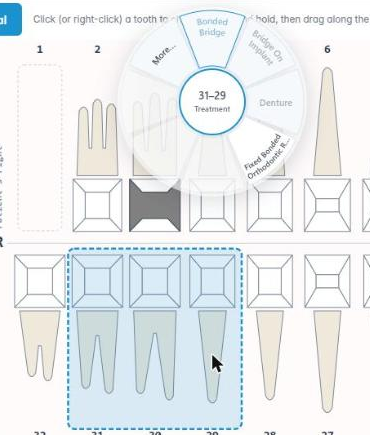
Mark the teeth the work covers. Either press and hold on the first tooth until a ring fills round it, then drag along the others, or click the first tooth’s number and Shift+click the tooth at the other end. The teeth are outlined together and the dial offers bridge, denture and retainer items that fit.
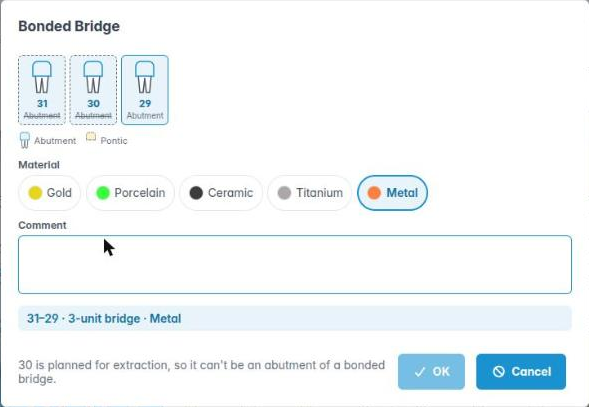
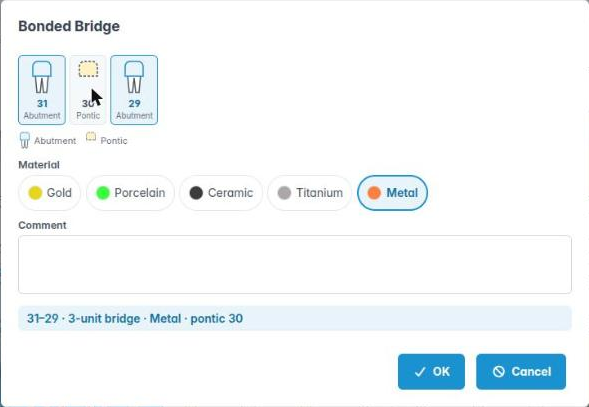
In the dialog, tap a tooth in the strip to change its role, for example from Abutment to Pontic, and choose the material. A summary shows what will be charted, such as 31–29 · 3-unit bridge · Metal · pontic 30. If something isn’t possible, the reason is shown beside OK. Press Escape or click another tooth to let the span go.
6. Tooth history
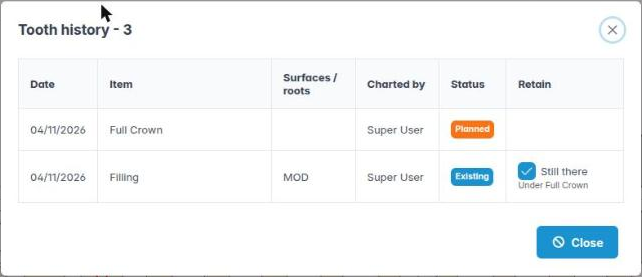
Click a tooth number (or press H with the tooth selected, or choose History… under More) to see everything charted on that tooth: date, item, surfaces or roots, who charted it and whether it is existing, planned or completed.
When later work covers earlier work, for example a crown over a filling, the earlier work has a Retain tick. Leave it ticked if the filling is still there under the crown; untick it if it was taken away.
7. Undo

Undo on the chart toolbar (or Ctrl+Z, Cmd+Z on a Mac) takes back your last change. Press it again to go further back, up to 50 steps. Point at the button to see the step it will take back, for example Undo: Charted 19 O · Filling · Composite.
More
- Images on teeth: the Images tray on the left lists the patient’s X-rays and photos. Drag one onto a tooth to link it; a badge on the tooth shows how many are linked.
- Keyboard: Tab to the chart, use the arrow keys to move between teeth, the letters M, O, D, B, L and P to pick surfaces, and Space to open the dial.
- Practice dial: what appears on the dial’s inner ring is set in Housekeeping › Tooth Dial Layout.
- To go back to the old chart for everyone in the practice, untick Use new charting in Preferences › Charting Systems › New Charting.
- For the perio chart, see Getting started with the perio chart.