
Chiral Cloud 2.0.76 has a redesigned perio chart, drawn to match the new dental chart. You record with a large probe pad, by typing readings, or with a nurse calling out the site. Every reading is saved as you enter it. This guide takes you through the basics.
The pictures use a made-up test patient in a demo practice that numbers teeth 1–32 (American Universal). Your chart uses the Tooth Numbering Scheme set in Preferences › Charting Systems: British (for example UR6), American Universal or European (FDI).
1. Opening a perio chart
Open the patient’s appointment and click the Perio tab. Earlier charts are listed under Charting History, newest first. Click + to add a new chart for today.
To record on a chart, right-click it in Charting History and choose Edit Perio Chart. Until then the chart is only shown, so nothing can be changed by accident.

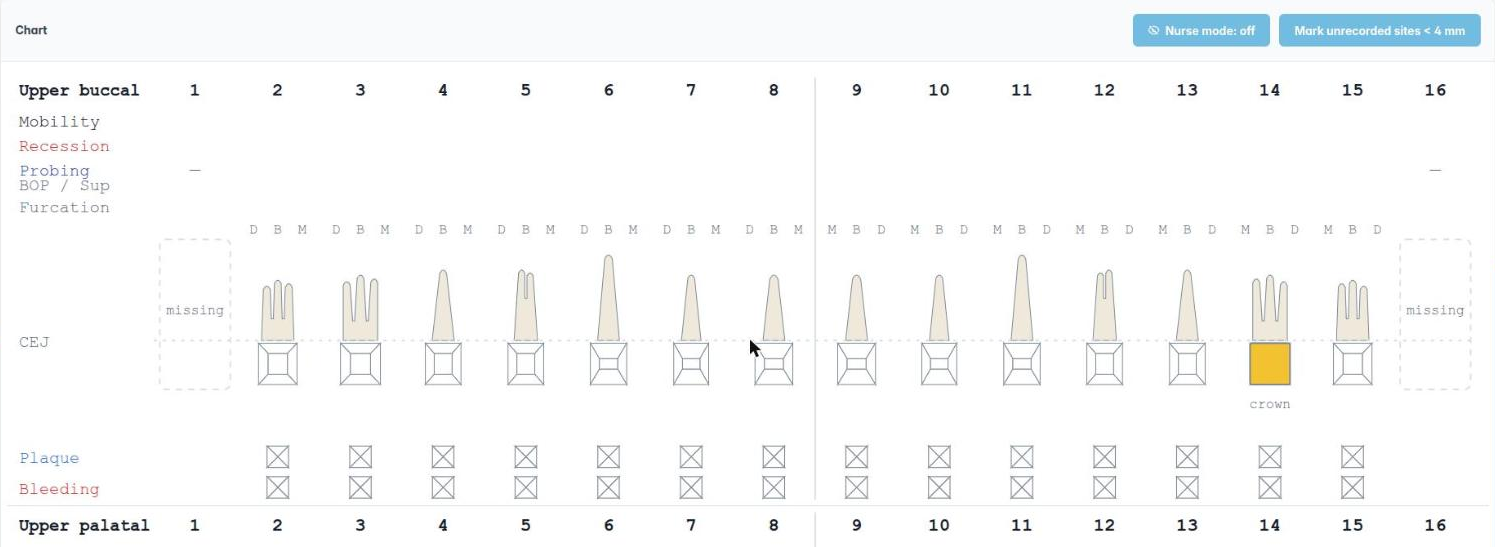
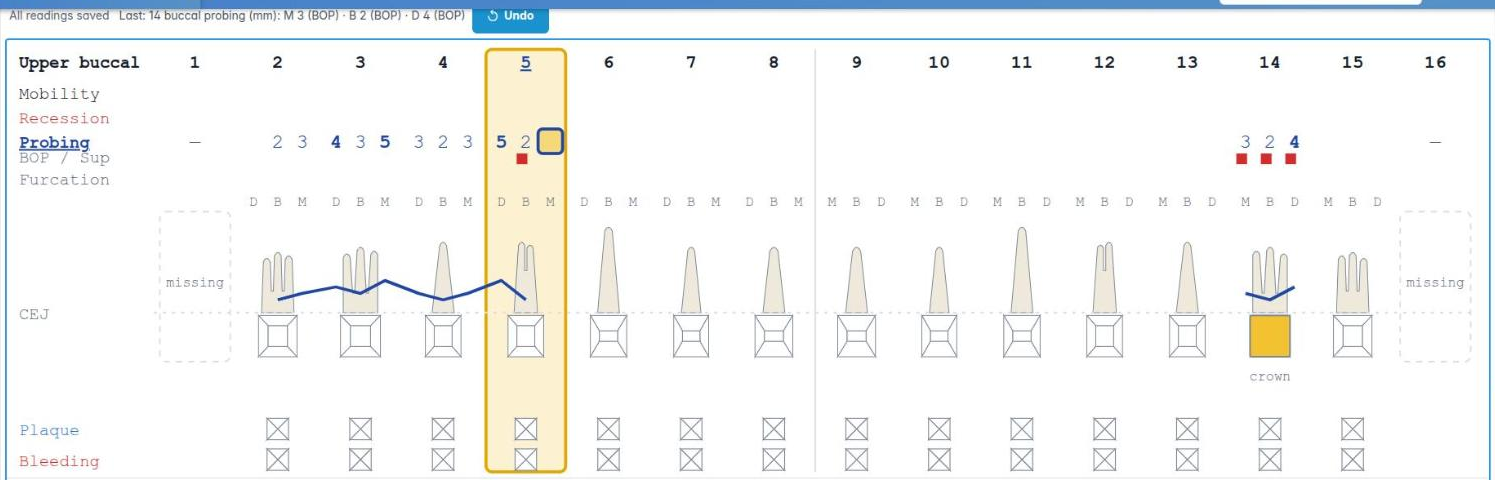
The whole mouth is shown in four bands: Upper buccal, Upper palatal, Lower buccal and Lower lingual, one column per tooth. Each band has rows for mobility, recession, probing depth, bleeding and suppuration, and furcation, with plaque and bleeding below the teeth. The chart takes missing teeth, crowns, implants and pontics from the patient’s dental chart, and teeth that aren’t there are skipped when you record.
2. Recording with the probe pad
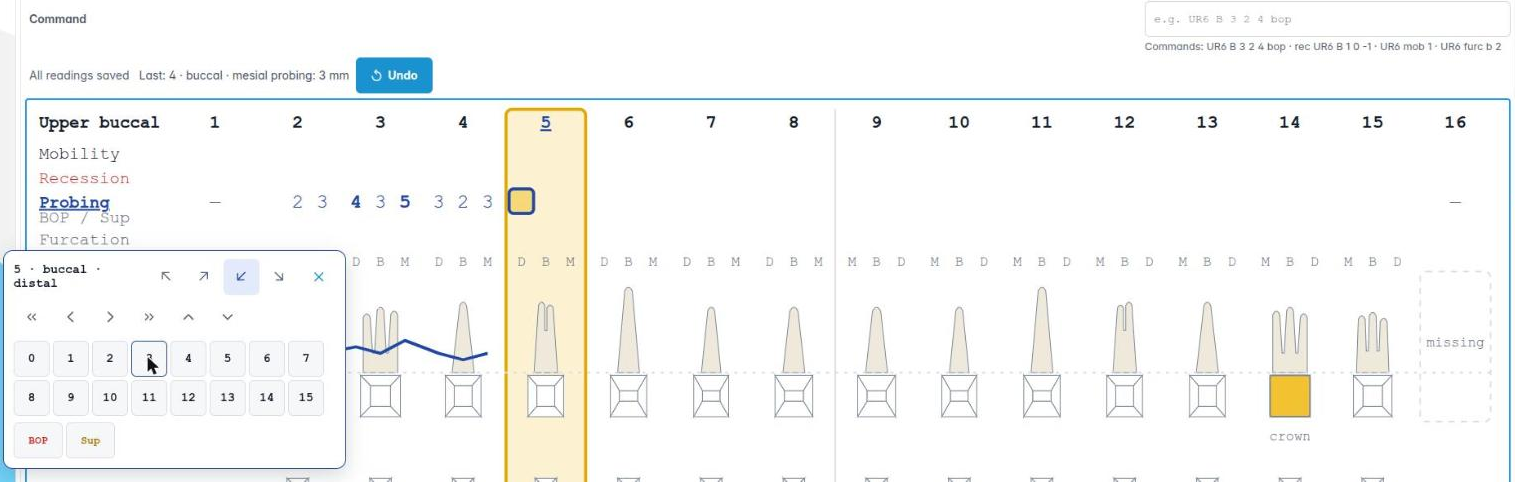
Click a tooth to start at its first site, or click a value to start at that exact site. The tooth being recorded is highlighted, and the probe pad opens in a corner of the screen, naming the site, for example 5 · buccal · distal.
- Tap a number to record that depth; the pad moves on to the next site.
- BOP and Sup mark bleeding on probing and suppuration at the site.
- ‹ › move one site, « » a whole tooth, and ▲ ▼ change row.
- The corner buttons move the pad; it also moves aside if it would cover the tooth you are recording.
- × closes the pad.
Recording runs along each row, then on to the next row and back to the top after the last. The pocket depth is drawn on the teeth as you go. The keyboard works too: type the numbers, and use the arrow keys, Page Up and Page Down.
The bar above the chart says All readings saved once each reading is saved, and shows the last one. Undo (or Ctrl+Z) takes it back. If a save fails, the bar says why, with Retry.
Values outside the normal range are refused with a message: probing depth 0–15 mm, recession −5 to 15 mm and mobility 0–III. Type two digits quickly for 10 or more.
3. Nurse mode
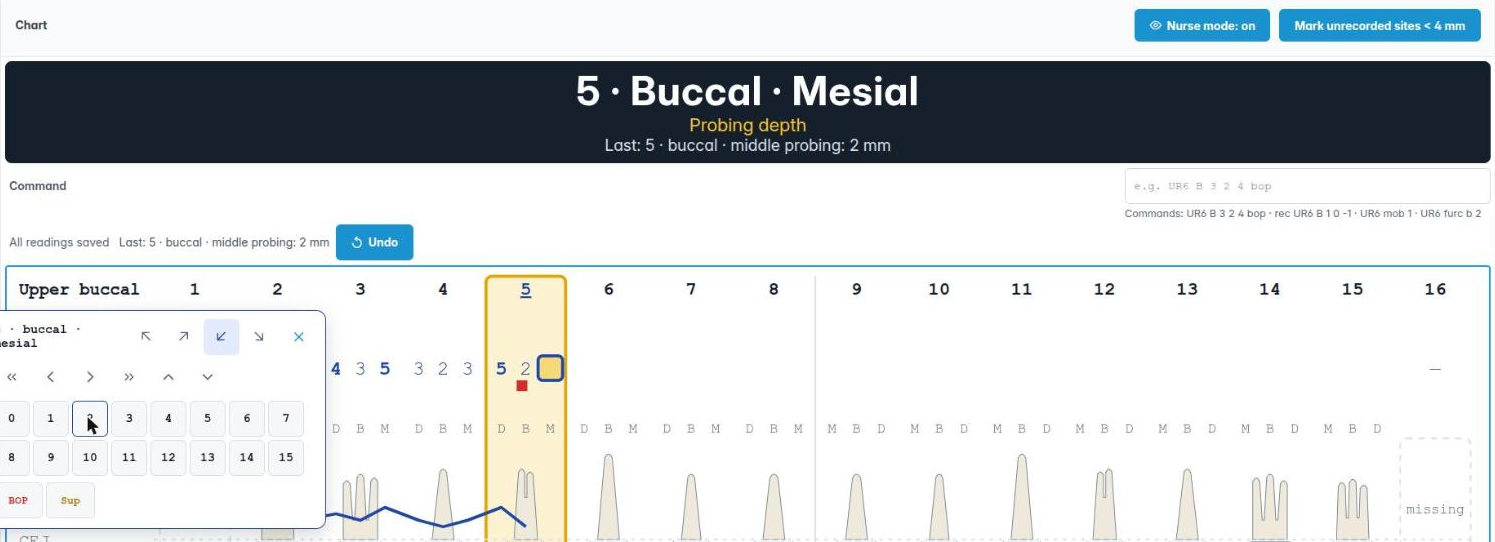
Click Nurse mode above the chart when a nurse is entering the readings the clinician calls out. A large banner names the site being recorded, for example 5 · Buccal · Mesial · Probing depth, and the value just entered, so it can be read from across the room. It is remembered in your browser.
4. Typing readings in the Command box
Type a whole tooth’s readings into the Command box above the chart and press Enter, for example 14 B 3 2 4 bop: tooth, side, the three depths and bleeding. As you type, the line underneath says exactly what will be recorded.
Other commands: rec for recession, mob for mobility and furc for furcation; examples are shown under the box. The Up arrow brings back your last line.

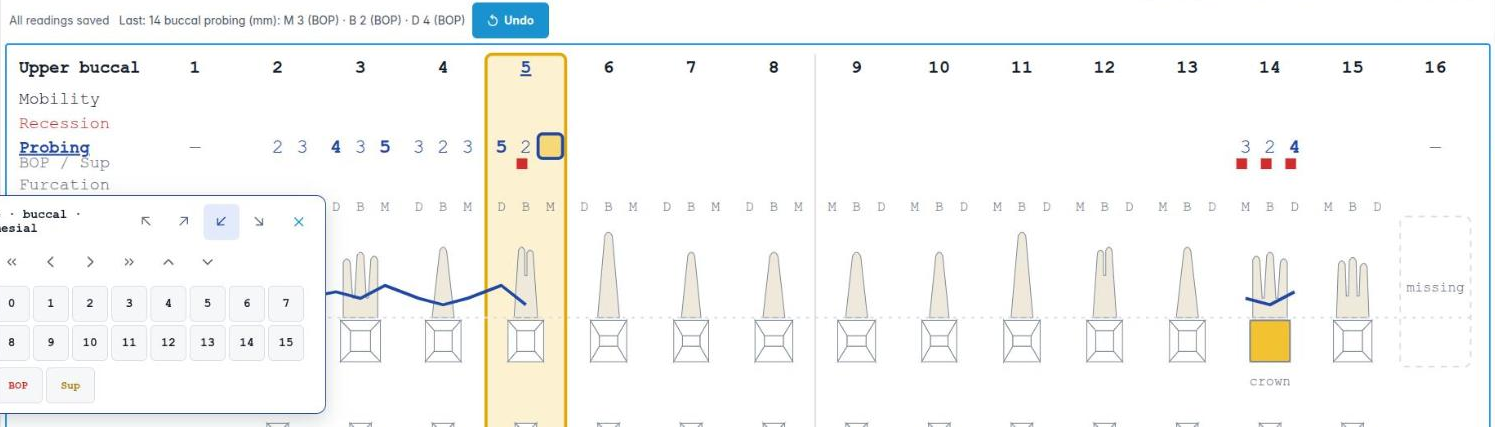
5. Finishing
- Mark unrecorded sites < 4 mm records that the sites you didn’t probe were under 4 mm.
- Plaque is shown in blue, bleeding in red and suppuration as a yellow dot; the plaque, bleeding and BOP scores only count natural teeth that are present.
- If the dental chart has changed since the perio chart was started, a note says what changed, with Update this chart.
- Readings are saved as you go, so there is nothing else to save.
- For the dental chart, see Getting started with the dental chart.