
The Tooth Dial on the new dental chart shows the items you use most on its first ring. The practice chooses the standard layout in Housekeeping, and each clinician can arrange their own copy from the chart. See also Getting started with the dental chart.
1. The practice layout
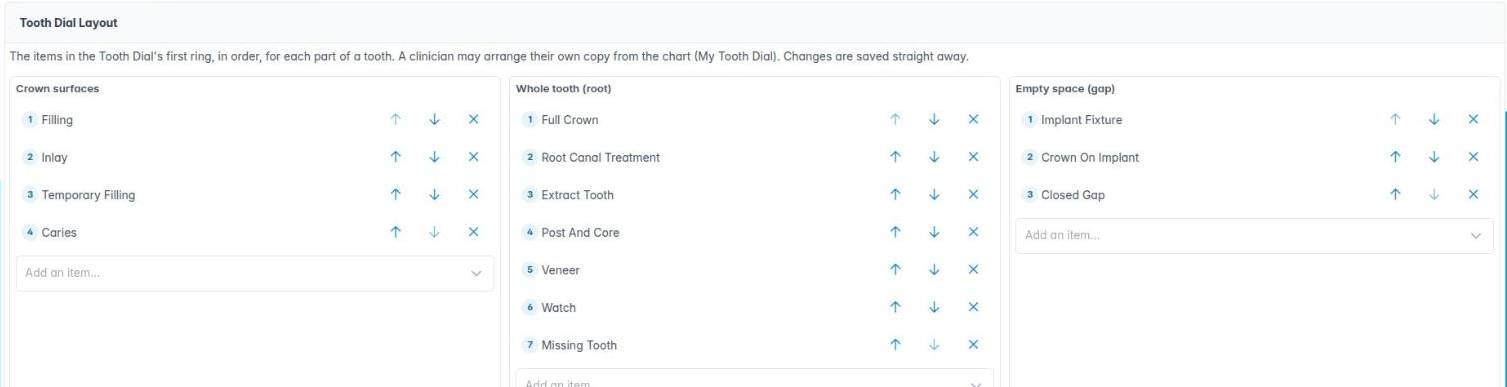
Go to Housekeeping › Tooth Dial Layout. There are three lists, one for each part of a tooth you can click:
- Crown surfaces: what is offered when you click a surface, for example Filling, Inlay, Temporary Filling and Caries.
- Whole tooth (root): what is offered when you click the root or the whole tooth, for example Full Crown, Root Canal Treatment and Extract Tooth.
- Empty space (gap): what is offered on a gap, for example Implant Fixture, Crown On Implant and Closed Gap.
Each list is numbered in the order the items go round the ring:
- Use the up and down arrows to change the order.
- Click × to take an item off the ring.
- Use Add an item… under a list to add one. A ring holds up to 7 items; anything else is still under More… on the dial.
- Changes are saved straight away; there is no Save button. Reset to the standard layout puts the original items back.
2. My Tooth Dial
Each clinician can arrange their own dial. On the chart toolbar, with Dial on, click the button next to it (Arrange my Tooth Dial). The My Tooth Dial window has the same three lists. Your changes only affect you and are saved straight away. The footer says whether you are using your own layout or the practice layout, and Reset to practice layout goes back to the practice’s.